AO1 - Contextual Understanding
The Brief - 'Elevate the Ordinary'
Idea Sheet
PAULINE DARLEY - House of Clay
|
|
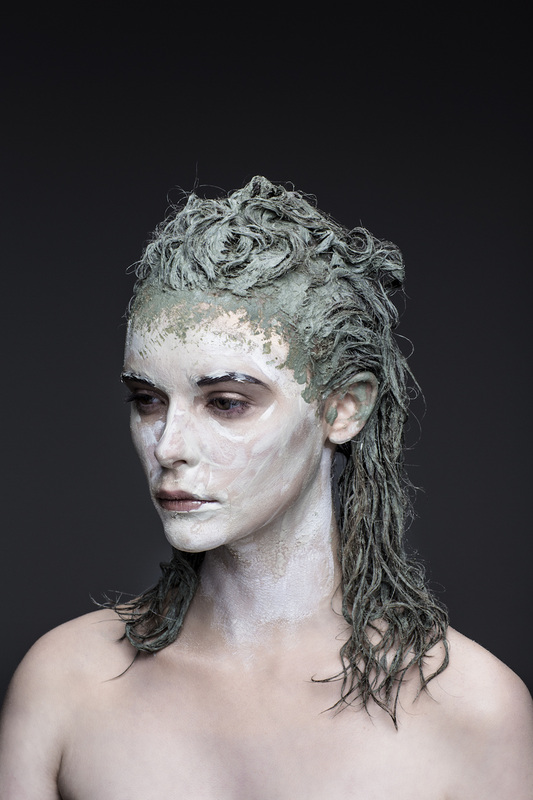
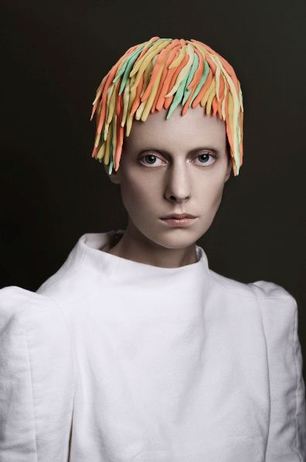
French fashion photographer Pauline Darley touches upon the idea of high fashion using skeletal make-up styles with this stunning series, 'She has waited too long' for Ever magazine. Darley has a number of impressive collaborations under her belt, including Marie Claire, L'officiel and Elle. Her portfolio is composed mainly of female portraiture and fashion, her style resulting in beautifully elegant and feminine images. |
|

|
|
From this artist i have chosen 2 images that will be used as inspiration for 2 different photoshoots. I will be using 2 different models so that the photo-shoots are separate. The artist has experimented with clay, this can link in with texture as they clay dries up creates cracks in the skin. The artist takes it further by adding colour, this links in with my brief of 'elevating the ordinary'. To create this look rather than using clay I'm going to experiment with food colouring and flower first before using actual clay.
|
More From Pauline Darley
|

|

|
AO2- Creative making
Photoshoot 1 - experimentation |
Photoshoot 2 |
|
|
|
About the shoot
These shoots were experimental, using the same model in each. I chose a white background and lit the room as much as I could. The compositioning of the photos is a close up from the shoulders up. Using props such as make-up and paint I used Pauline Darley's work as inspiration. She works with paint as you can see with the images above I have tried to so the same in photoshoot 2 . With the first photoshoot I used make-up to contour the model using a cream colour and brown. I learnt this technique through watching youtube videos. With the second shoot I used acrylic paint and coloured hair stray. To achieve this look I mixed white into black so that I got a light grey colour that looked like it had a tint of blue. For the models hair I used a coloured hair stray of blue. As this model was previously used by another student that had put green powder in this hair, he had found it difficult to wash out and so I worked around this by adding a blue hair spray to get a green/blue ombre effect. When comparing the quality of the images I can see that the lighting I had used for the second shoot is better than the first shoots. This could be because with the second shoot I had a light coming for very angle as i had people to hold the lights. overall this photoshoot was not a success but will help me improve my work.
Photoshoot 3
About the shoot
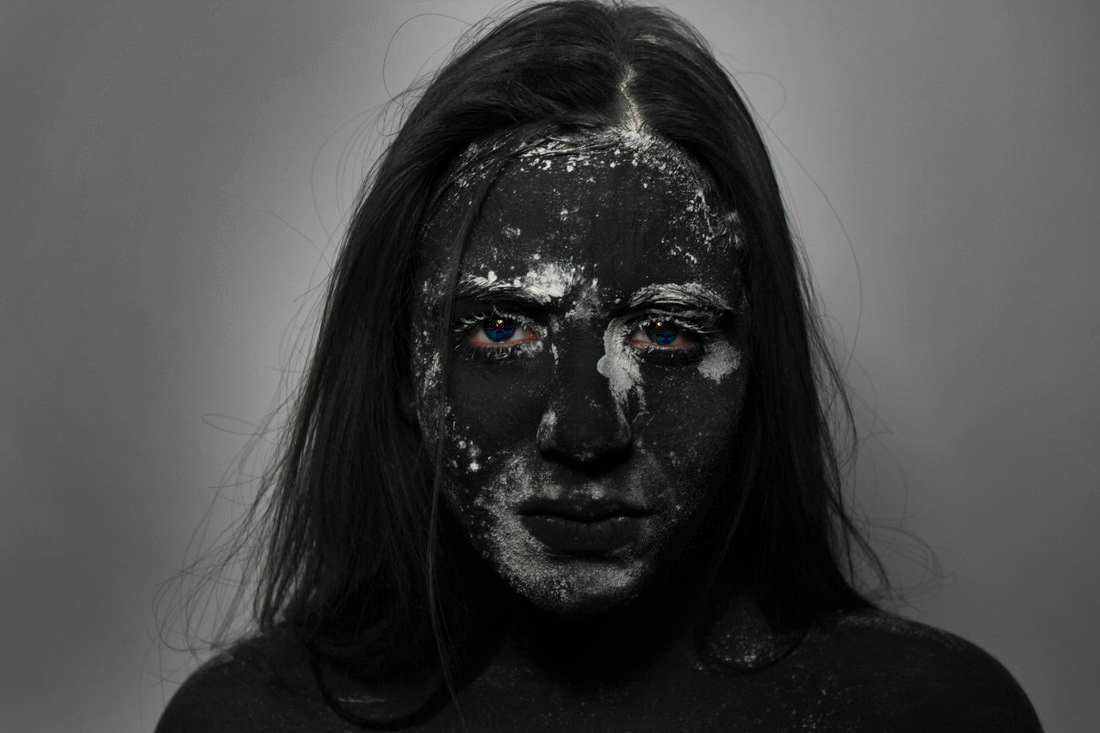
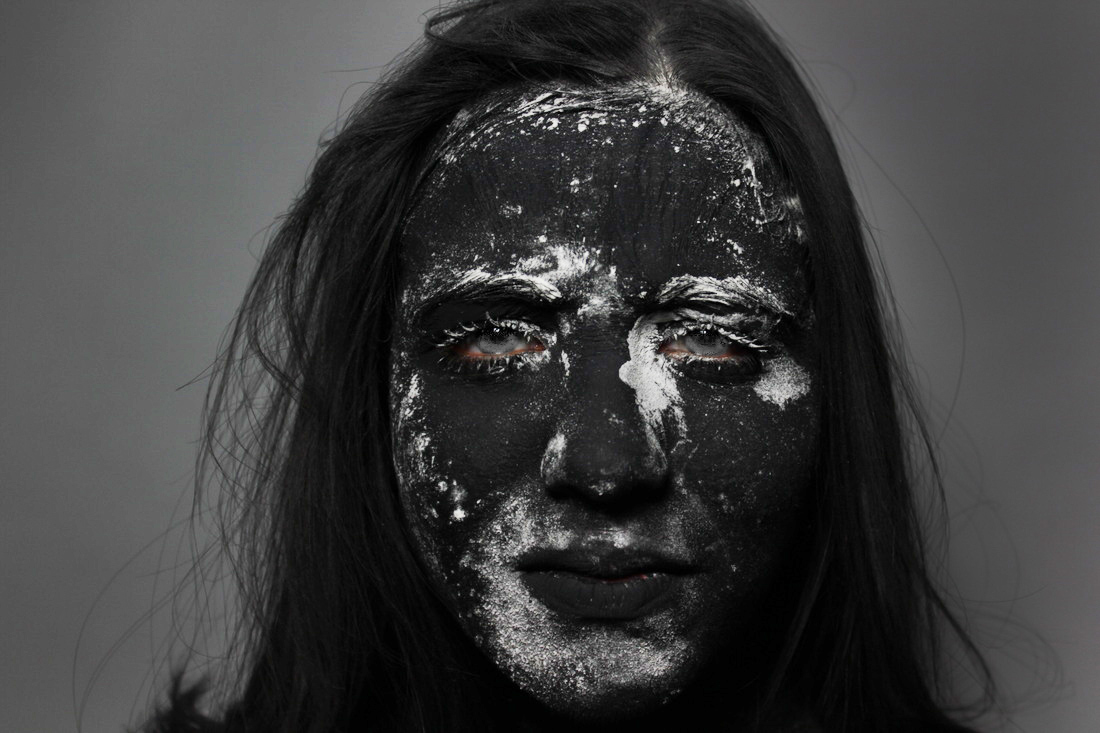
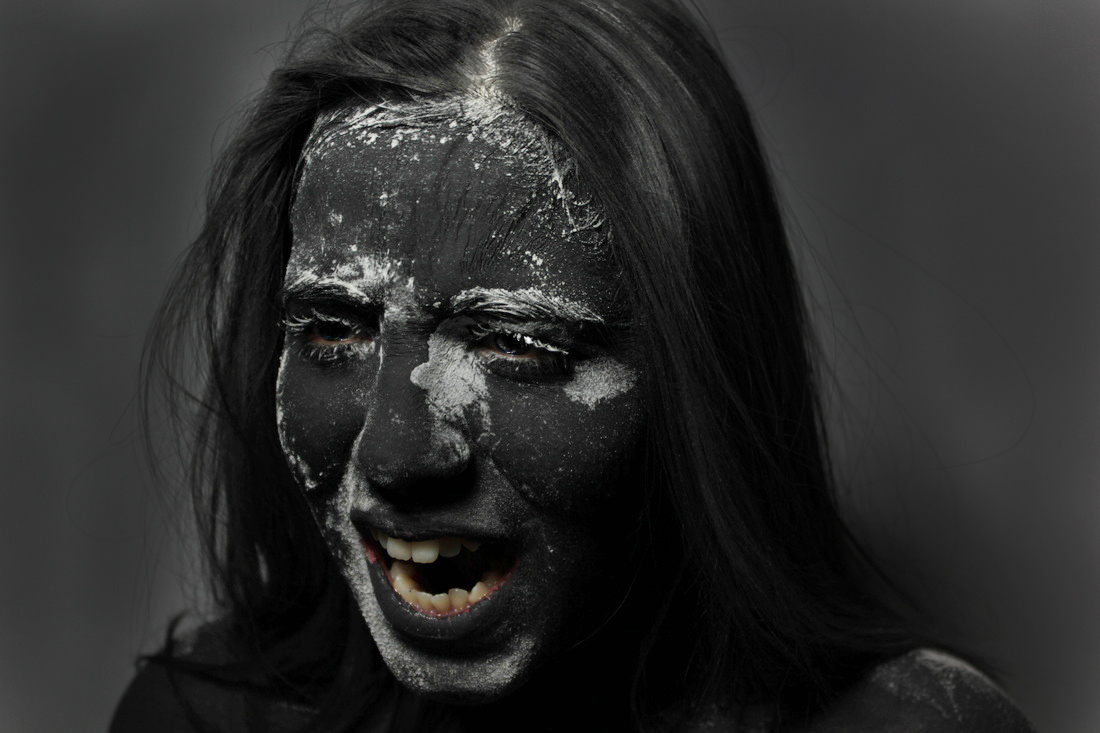
For this photoshoot I used a female model with black hair. Like the previous photoshoot I used a range of angles to a variety of shots. To achieve this look I used acrylic black paint as a base layer. Having previously used acrylic paint I know that when it dries it starts to create cracks on the face and so I did two layers of paint letting it dry for a time period in-between. After doing this I then went on to ass the white powder, my method of applying the white powder was to have a handful of powder in my hand and throw it at her face so that I wouldn't have a large chunk of powder in one section of her face, I also applied some powder in her hair. With this photoshoot I found lighting difficult, this was because I had chosen a white background because I wanted the final image to be dark with the white powder standing out. I used butterfly lighting at first and saw that i wasn't achieving the look i wanted to, so I then used Rembrandt lighting and so this meant that I only had one lighting source. The issue with this was that parts of the faces wasn't lit. This is something I tried to fix when editing, using the dodge tool mainly I brought out parts of the image that were too dark. Using the burn tool to make the background darker to a grey colour. I then experimented with the eye the dodge tool and hue/saturation method.
AO3- Reflective Recording
photoshoot 4
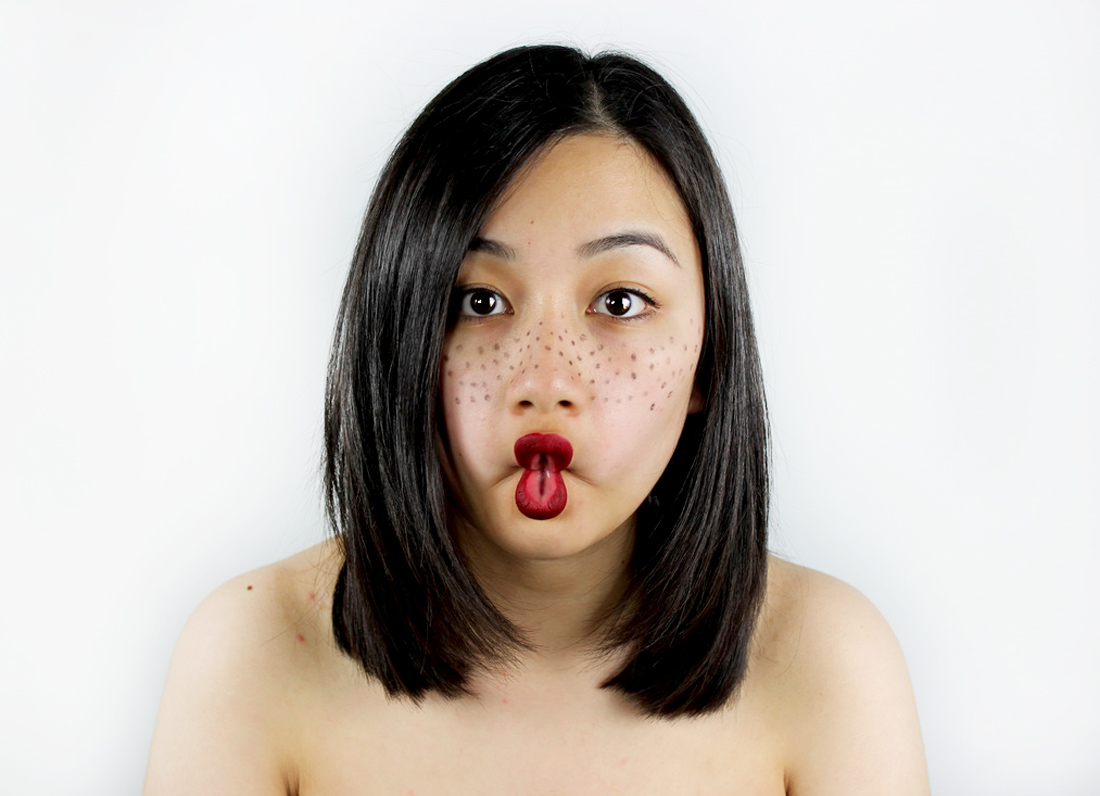
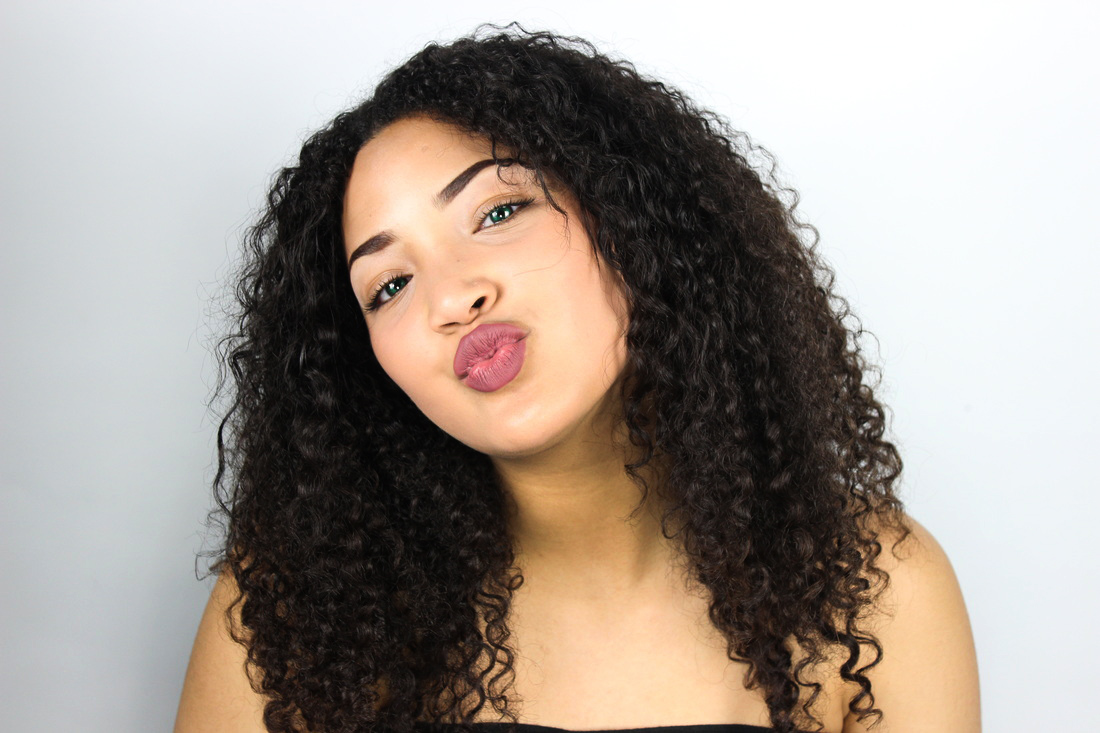
About the shootThe subject of this photoshoot was the model and her features. Iv added freckles to the models face and she is only wearing a red lipstick. Her hair is a dark brown making the lipstick effective as a whole. The lighting i used was butterfly lighting as i wanted the face to be clear and well lit. Butterfly lighting is flattering to the face, its used for more glamorous shots. In my opinion, this type of lighting helps the image look more powerful. I chose a white background as i wanted the colour of her lipstick to stand out the most, like I'm going to do with there photoshoots. At the time of the photoshoot, I had asked the model to make funny faces and expressions she would usually make. As u can see I'm the slideshow above i asked the model to make 3 different face; one straight face, one smiling slightly and the fish lip.
|
EditingWhen it comes to editing, i first changed the brightness and contract of the image because looking at the original image itself even through its lit properly the quality of the image is poor. What i can do to improve with the my shoot is try to light the room up more or change the type of camera I'm using.
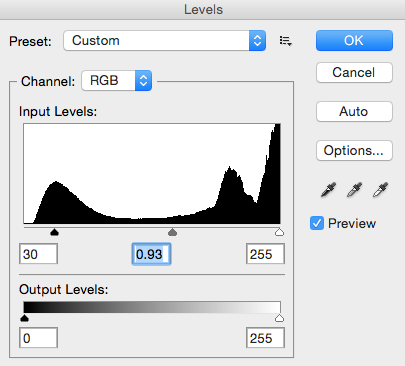
Next i played around with the levels tool...

Click image to enlarge
With this tool it helped to bring out the colour of the model's face to brighten up the face. With the dodge and burn tool i would find that it made the image either too light so that it looked over-exposed or to dark where her skin colour didn't look even.
To finish the image off I used one layer of dodge tool to lighten the background and used the burn tool to slightly darken the lipstick so that it became more of a cherry colour.
|


Photoshoot 5
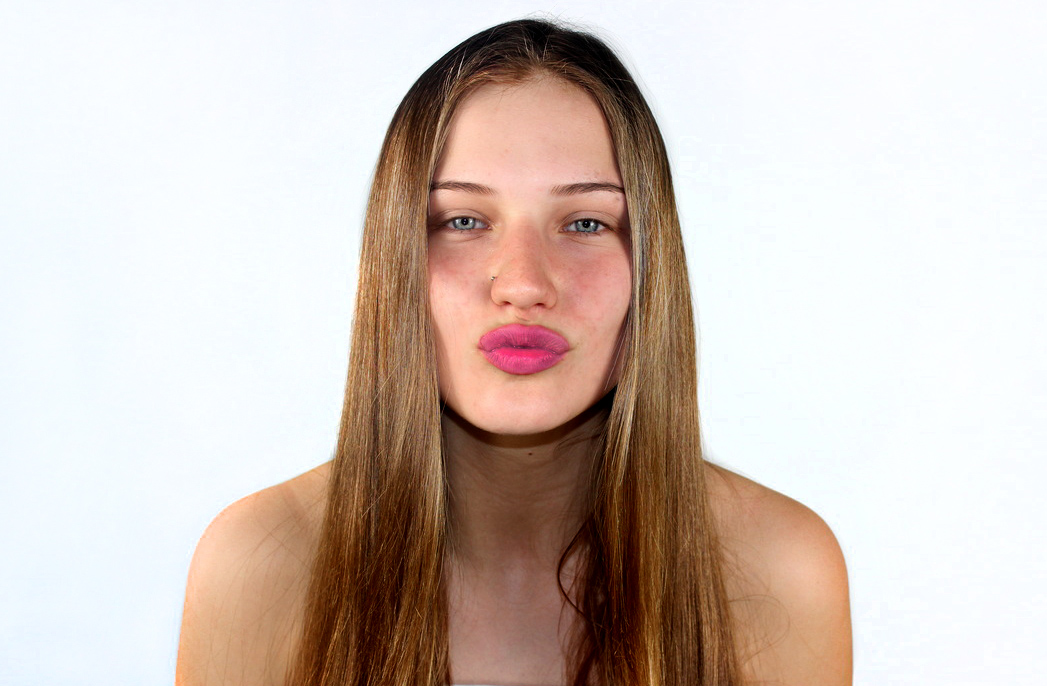
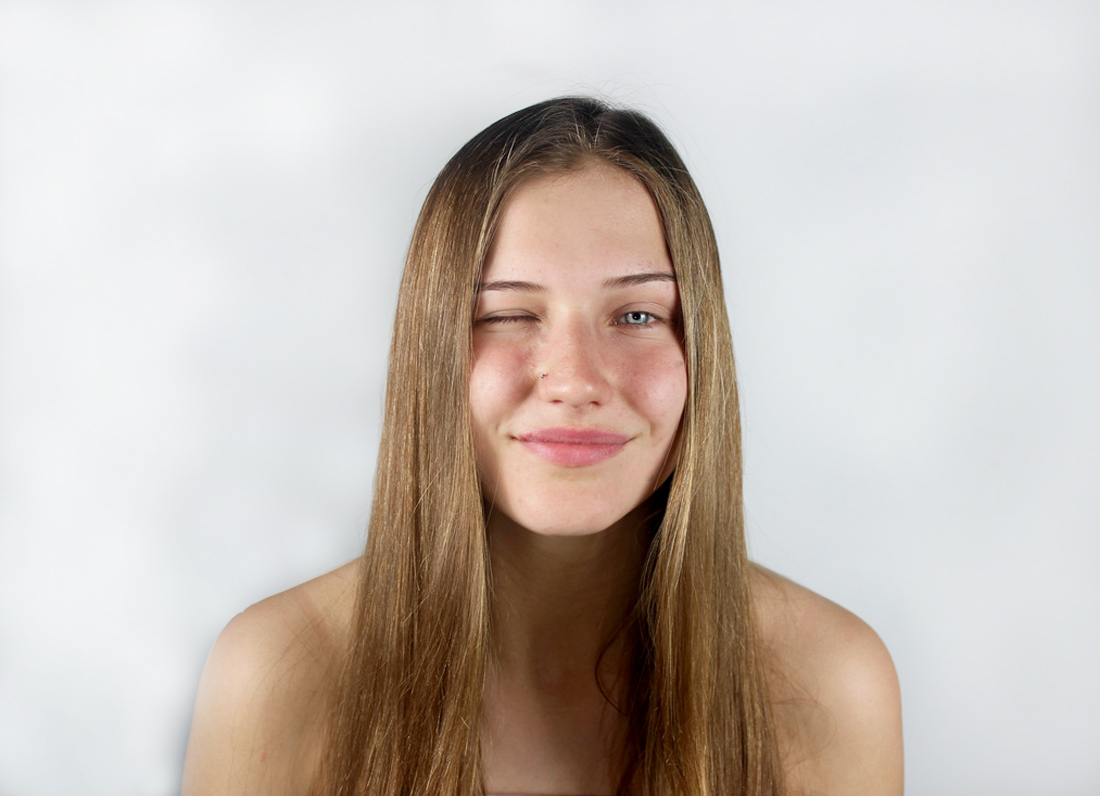
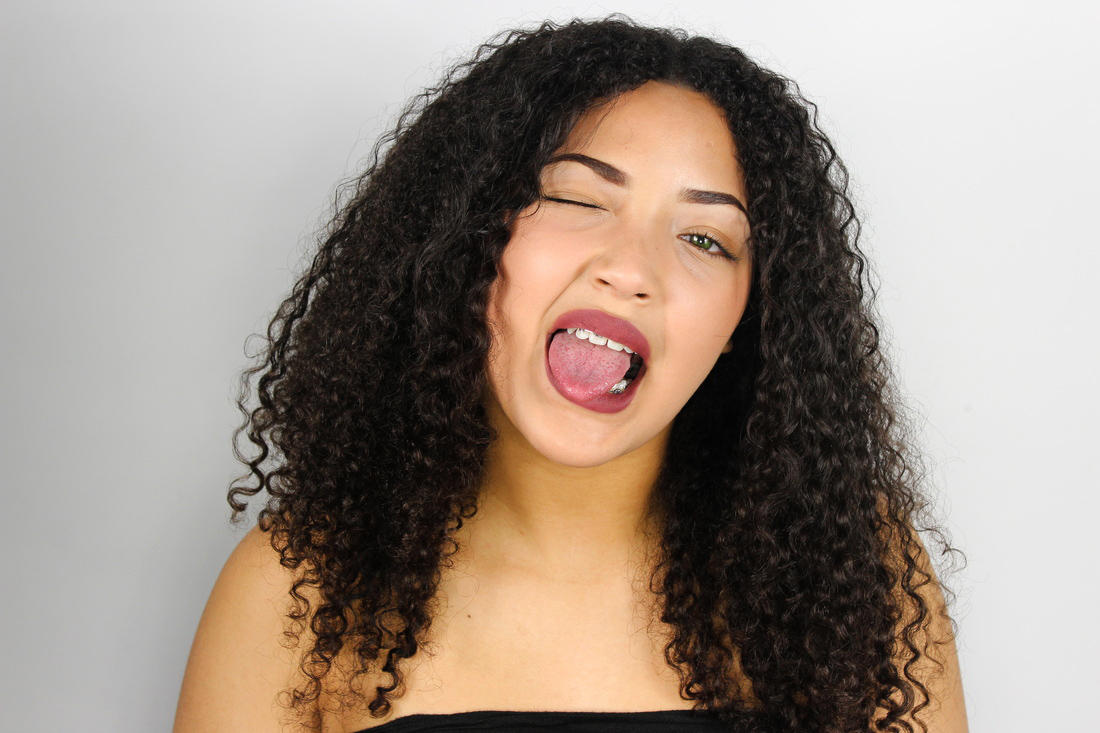
About the shootFor this photoshoot is used a completely different model to my first photoshoot. This model is blond hair with blue/grey eyes, her skin is fairly white and she can resemble and eastern european female. She has no makeup at all, this is because i wanted to show her natural beauty and use that to intrigue the audience. In terms of lighting i used the same lighting (butterfly lighting) as my first shoot. The background is also the same as i want to keep a consistency in my images. With this model i asked her to full 7 different faces; in some she was pouting, in some she was straight faces and in others she was winking. The model winking brings attention to her eyes which are her best and most interesting features the audience will identify.
|
EditingWhen it comes to editing I found it fairly hard as the quality of the image wasn't as best as it could have been. This may be because of the camera I had used or the lighting. I used similar techniques as i had done with the previous shoot. The main tools i used was the dodge and burn tool, spot healing tool, levels, brightness & contrast and hue & saturation.
Like similarly to the first three images i had edited the levels and brightness and contract was used to bring out the colour of the model so that she didn't look too dark or too over exposed. looking at the raw images i already knew that i would have to brush up her face because she had to foundation on to cover the spots she has and so with the spot healing tool i took away as much i could without distorting her face and making the image not natural. The hue & saturation was used to edit the eyes to make them stand out even more. |

photoshoot 6
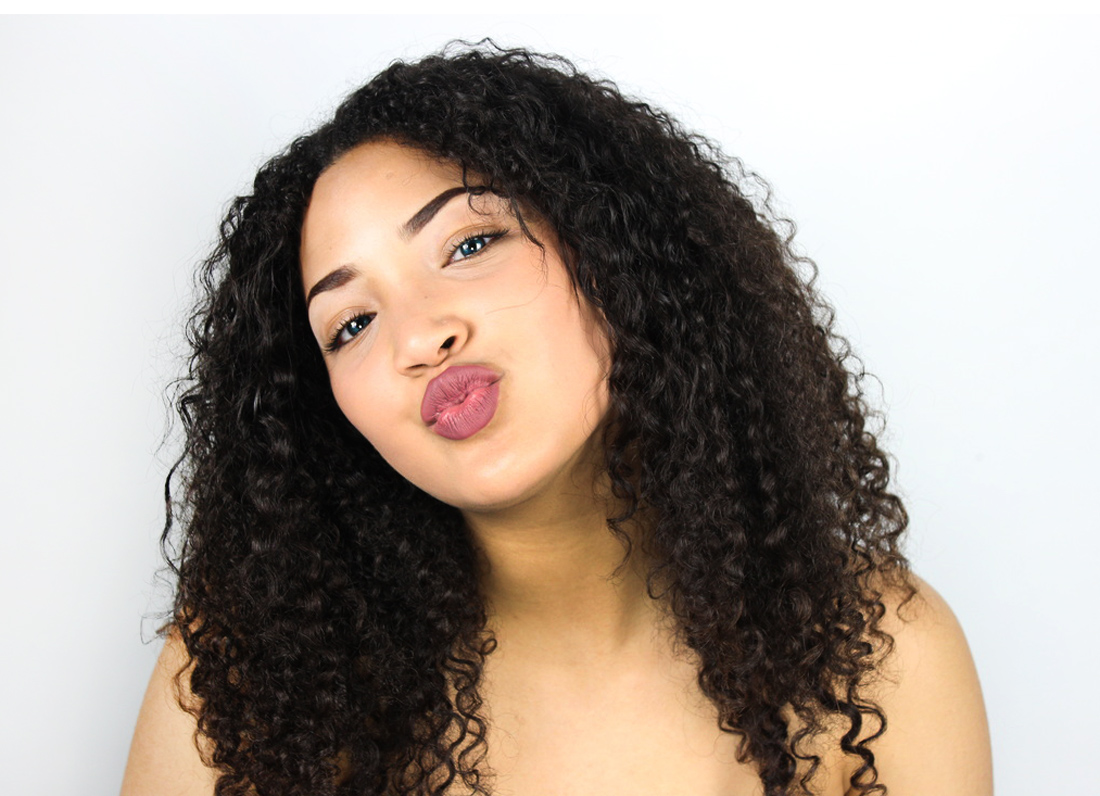
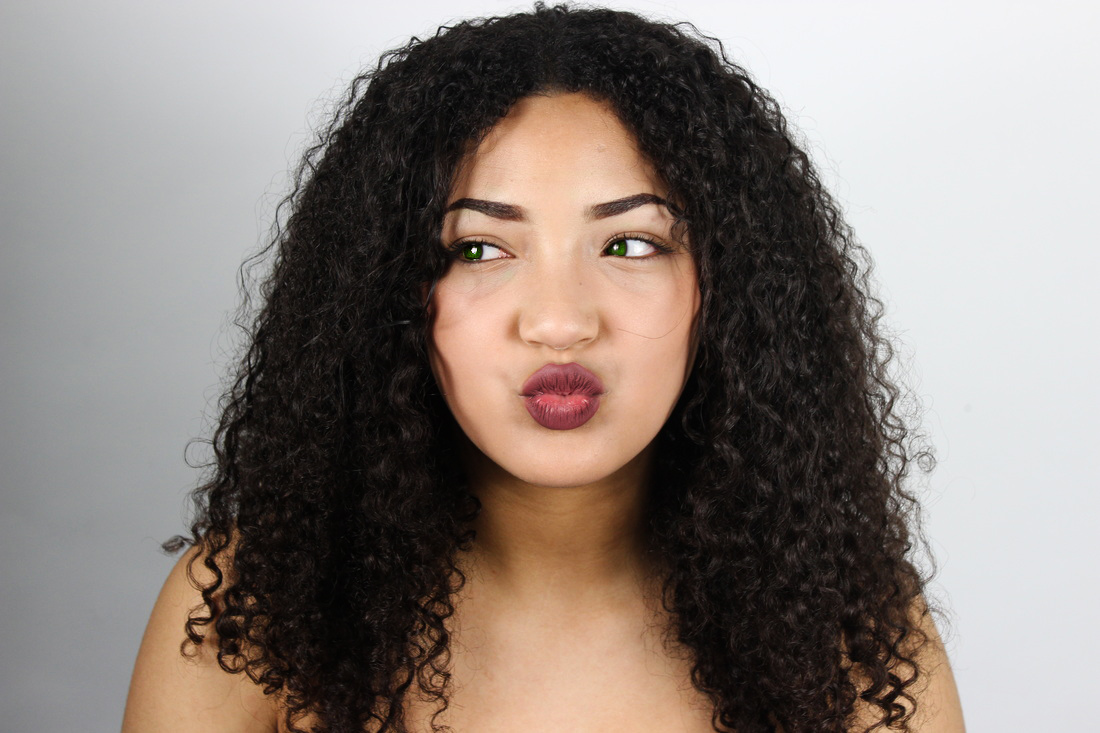
About the shootFor this photoshoot I used a model with dark curly hair and dark eyebrows to go with it. She has a touch of foundation and a nude colour lipstick. When I look at the model the most sticking feature would be her 'curly bushy' hair. Like the previous photoshoots, her shoulders are bare and the composition of the image is the same. I used the same background as the previous shoots. For this shoot I used three different light sources all in the style of the butterfly lighting; because of this the quality of the images have improved. Just like the previous shoot the model made a number of face expressions that were quirky and cute.
|
EditingWhen editing, I found it easy due to the quality of the image before hand. Using the same techniques, I changed the brightness of the image slightly then moved on to play with the levels.
click image to enlarge
By slightly bringing the dark arrow up to 30 it contrasts the image darkening her hair and eyebrows but also at the same time her skin tone. To fix this I used the grey arrow to slightly lighten the tone of her skin. Like most people I identified that the face and body of the model was different and so I used the burn tool on a midtones range with a low exposure and went over her face until it was of a colour closest to the rest if the body.
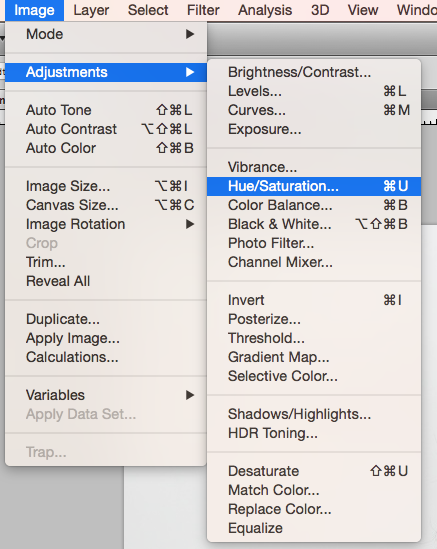
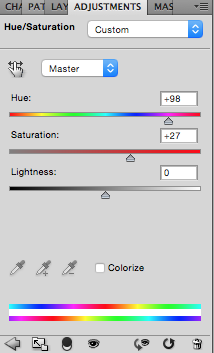
After this I moved on to edit her eyes using the hue and saturation tool by simply going to image then adjustments then to the Hue/Saturation option.
|
click image to enlarge
To do this I first had to duplicate the image just incase I make a mistake and can delete the layer easily.
click image to enlarge
For this models look I wanted her to have either blue or green eyes as these are more realistic colours and so to achieve this I pulled the hue up high and this came out as a green colour. I brought the saturation up slightly to get the green to blend in with her eyes for that it looks realistic.

click image to enlarge
After picking a colour I was left with the image above. Using the marquees tool, I selected the area in which I wanted to change and so selected the eyes.
click image to enlarge
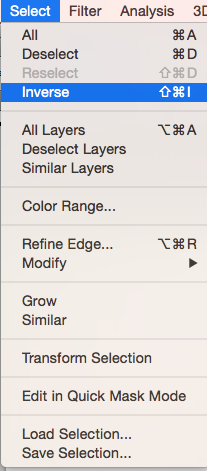
To make it easier to erase the space around the box of the eye I went to select and used the inverse tool. This allowed me to erase the rest of the image from the hue and saturation and focus more on the eye.

click image to enlarge
After erasing everywhere around the eyes I was left with the image above. As i had done this on another layer I was able to go back onto the hue and saturation tool and still be able to adjust the eyes to whatever colour I wanted. Using the dodge tool I lightened the eyes a bit more so that they are more of a realistic green. Also using the sponge tool on a low exposure I took some of the colour out to make it blend in well.
|
Photoshoot 7 - part 1 |
photoshoot 7 - part 2 |
|
|
|
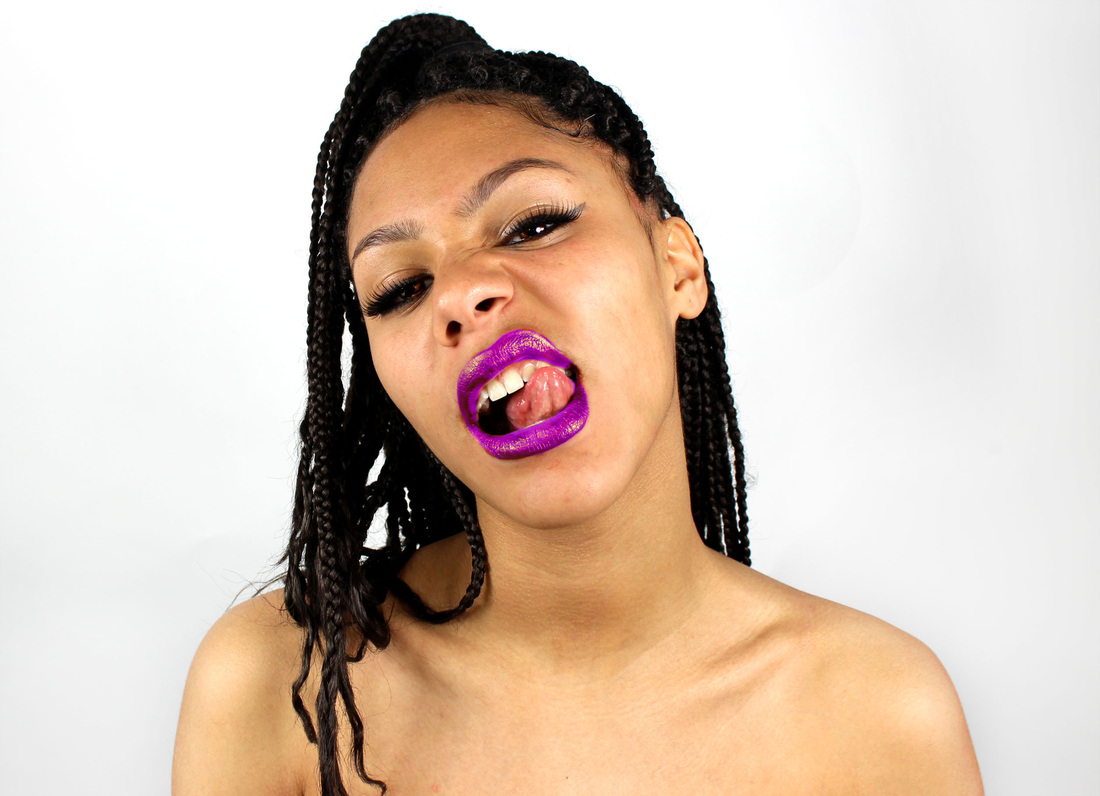
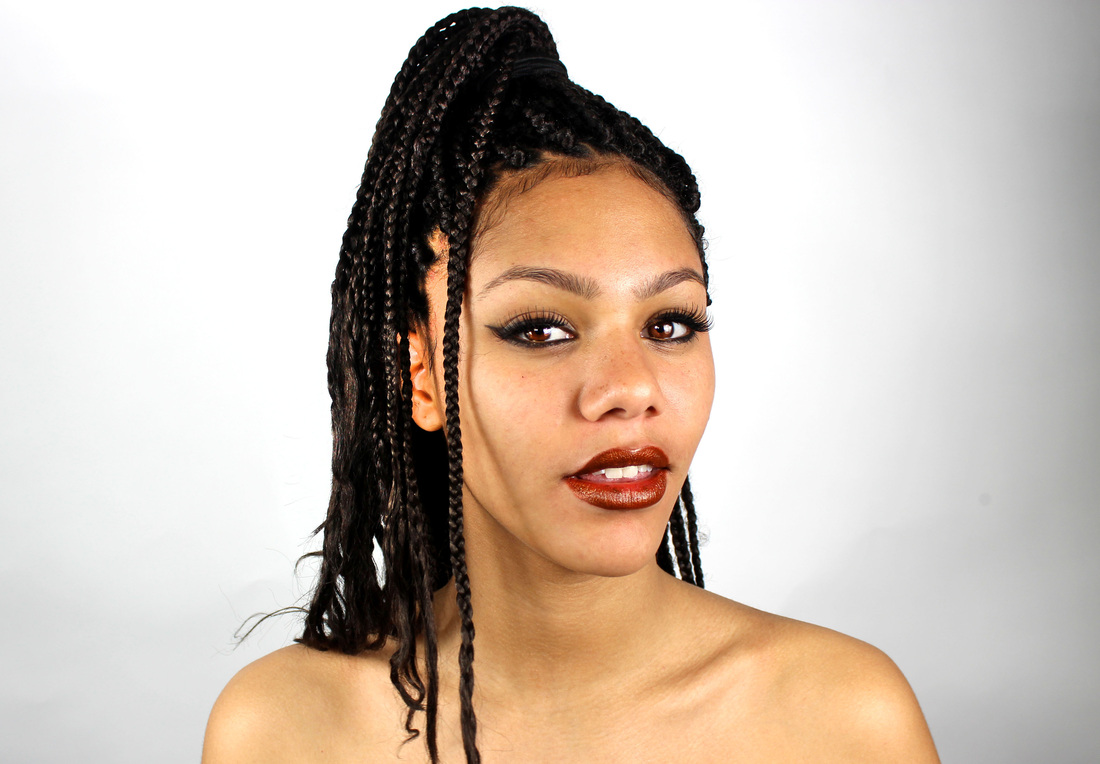
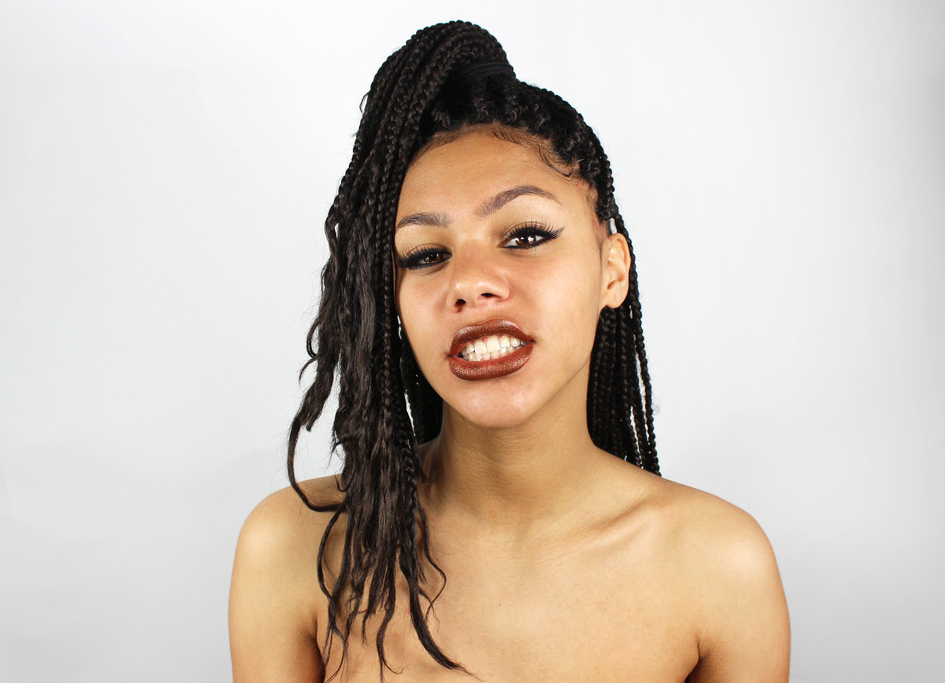
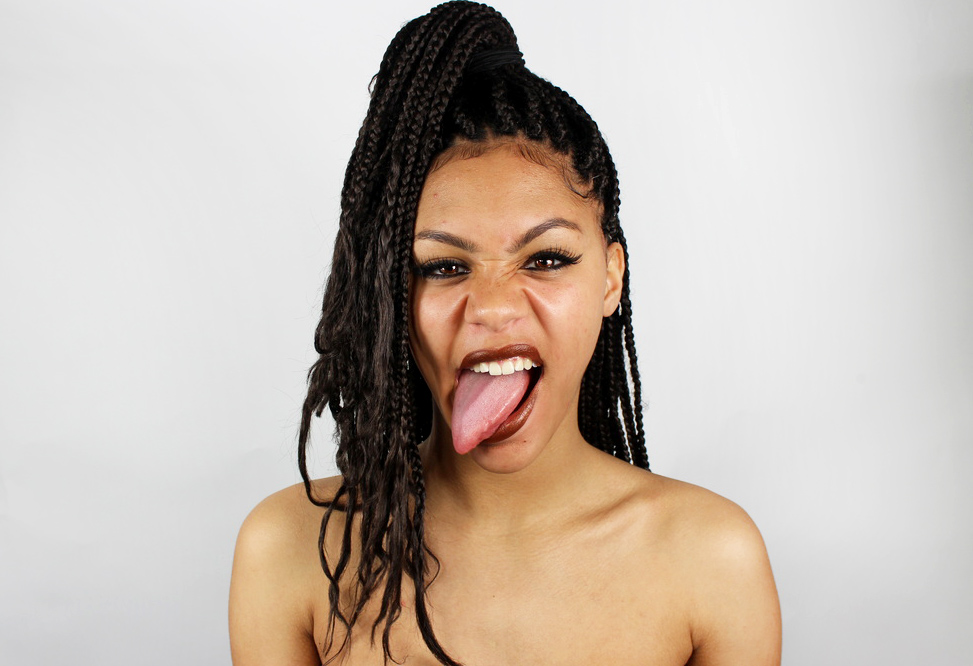
About the shootsFor this shoot i experimented with the look of the model, I choose to apply some make-up to the model that consisted of fake eyelashes, black eyeliner and 2 different lipstick colour. I made sure to compose the image similar to the other shoots so that its from her shoulders up. The lighting was the same as they previous shot so that there is enough light on the models face making the quality of the image as best as possible without over exposing her face. Having previously worked with this model I knew that because of her skin tone it was easy to over-expose her, so to face this I made sure to keep a certain distance between the camera and the lighting. Also I found it fairly easy to direct the model in what she had to do. I used the same background to keep a consistency in images. The first part of the photoshoot the model has on a brown shimmery colour. Just like the previous shoots I asked the model to pull a number of faces/expressions, some she is smiling and some she has a teeth and tongue showing. With the type of make-up I had put on the model i knew she had to have an edgy hairstyle, as the model had braid this made it easier to style her hair quickly and efficiently. To start off in the first part of the shoot i had the models braid half tied back out of her face with the few braids coming over her shoulder. Then i moved in to tying half of her braid up in a high pony tail still all behind her shoulders. After this i started to think what i could do to make it edgy and so i went on the internet to search up the looks i could do with braids and found a numerous of ideas. I finally went with just simply bringing her ponytail forward over the shoulders. Moving on to the second part of the shoot, i only changed the colour of her lipstick to a bright pink in contrast to the brown. As the main focus for me was colour it was important that i did a brighter colour on her to go with my previous shoots. With this shoot i asked the model to pull similar faces she had done before so that i could in the end compare which colour lipstick would fit in with the other shoots also adding in more extreme expressions.
|
EditingWhen it came to editing I used a similar technique as i had done with the previous shoot. I brightened the image up using levels on photoshop. The only difference when it came to editing part 1 of the shoot was that instead of changing the colour of the model's eyes to a completely different colour, I wanted to keep the brown eyes so that it would correlate with the brown lipstick. To do this I used the dodge tool gradually lightening her brown eyes. Zooming in close I used the burn to darken the edges her eyes defining them more. When it comes to part 2 of the shoot and editing, I looked at my previous mages and realised that another model had already had pink lips and so with photoshoot using the same technique as I had done when changing the colour of a models eyes, I changed the colour of the lipstick to a purple colour.
|

photoshoot 8
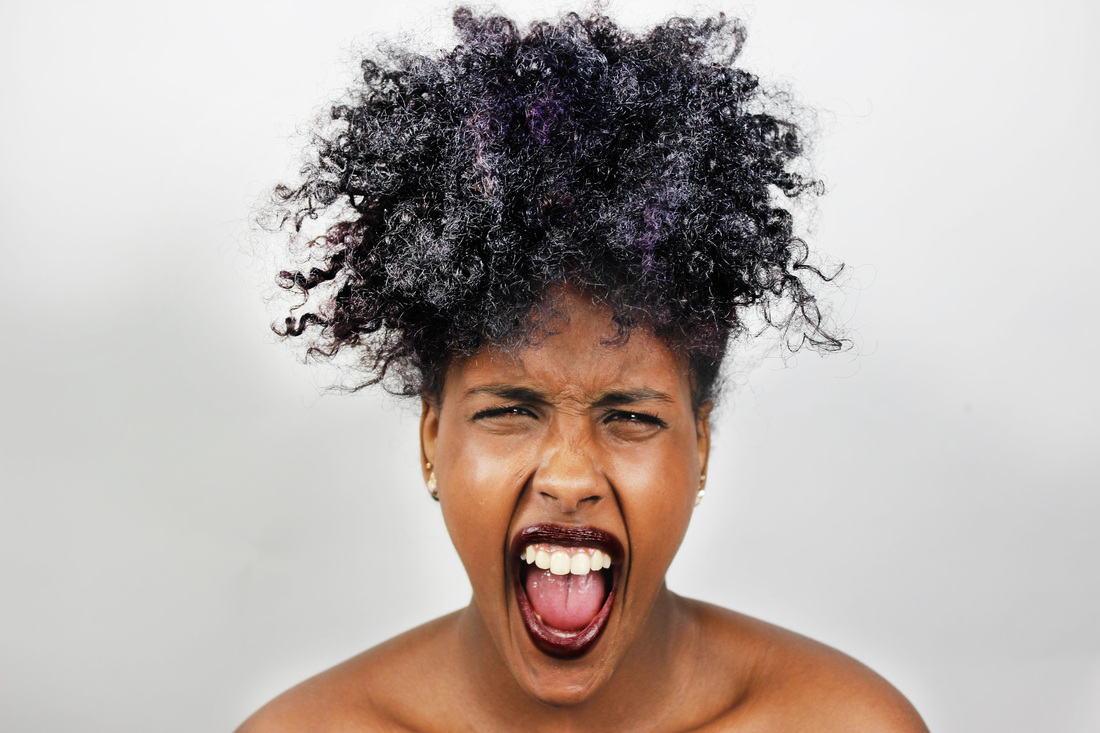
About the shootFor this photoshoot I choose a dark skinned mode in contrast with the other models I had used. I wanted to create a different look with this model in terms of costume/makeup. To keep that consistency I made sure to keep the background and lighting the same. In terms of costume/makeup, she has no make-up on except a maroon lipstick. As she had curly afro hair, I didn't want it to too plain and dry in the images and so I decided to add colour to her hair using coloured hair spray. Looking at the raw images, when taking the photos the purple and grey didn't come out but I knew with photoshop I could bring out the colour. As I had previously worked with this model too i found it easier to direct her in what expressions to pull. In the beginning of the shoot I asked the model to just simply pose straight faced so that the subject of the image would be her hair. To experiment I tried different angles, I knew that the final image would have to have the same compositioning as the rest but I still did some up close to so that I had a variety of shots. Then i moved on by asking the model to conduct different expressions; some she was looking up, some she was looking straight at the camera screaming as you can see below and just like the previous shoots she did expressions with the lips and tongue.
|
EditingWhen it comes to editing i used the same technique so that the quality of the images where at the same level as the previous strong shoots. For her hair I used the dodge tool to bring out he colour in her hair. As she had mainly purple in her hair, the grey meant that I would get different shades of purple. Using the burn tool I also darkened her lipstick so that the maroon would come out more. When it came to her eyes, I experimented with making them blue as you can see below using the same technique with hue and saturation. Looking at the final image I thought about how much colour was in this image, the blue clashed with her hair colour and took away focus from that and so I decided to that brown eyes would be most suitable as it would correlate to her maroon lipstick and keep the focus on their purple hair. To achieve the brown eyes I used the dodge tool.


|
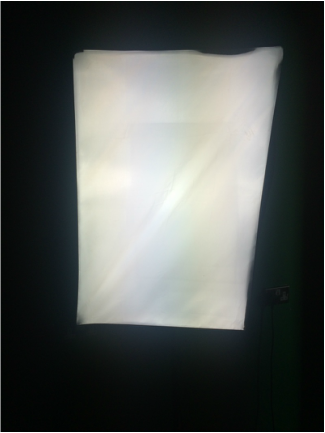
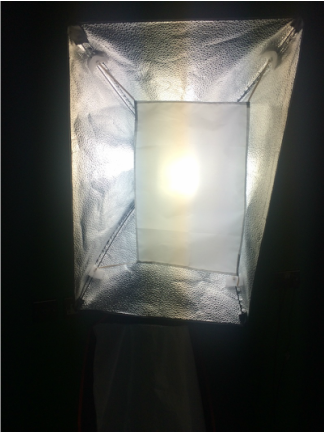
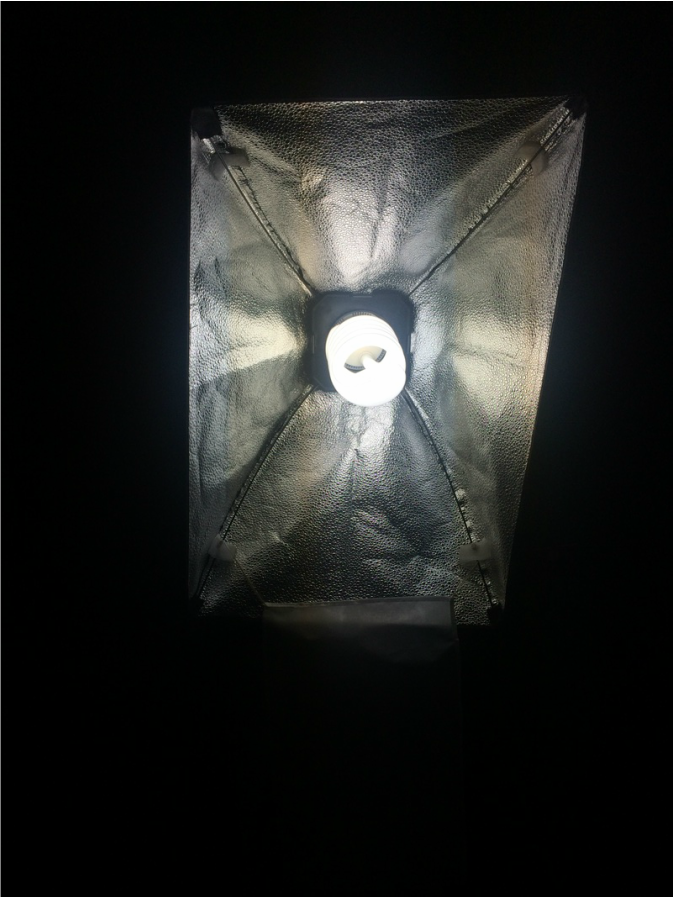
Lighting
|
|
|
|
The images above show the different stages of lighting I experimented with.
AO4- Personal Presentation