AO1- Contextual Understanding
'Brief 8- Research the visual aspects of a ritual, custom and tradition and produce a personal response to your finding.'
Idea Sheet
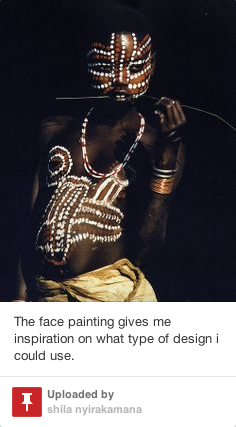
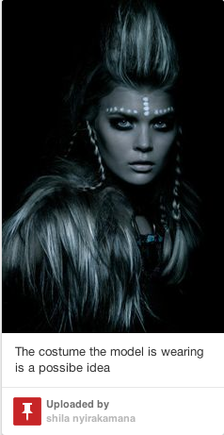
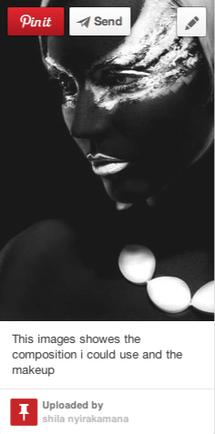
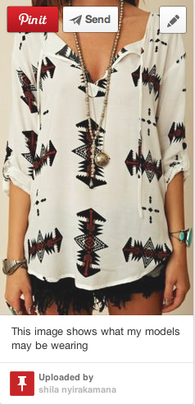
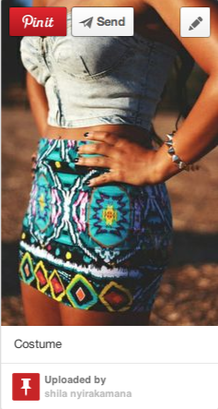
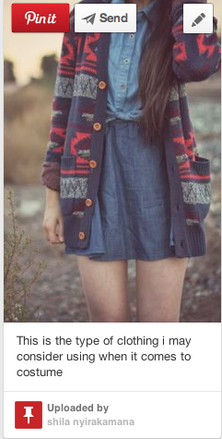
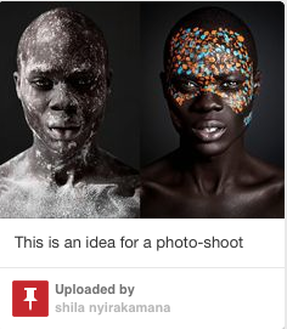
For my idea sheet i did a mood board on a website called Pinterest. I first researched tribal make-up and then i found images that related to what i was looking for, with these images im going to use some of the ideas but not completly the same.
|

|
|
|
|
|
|
|
|
|
|
|
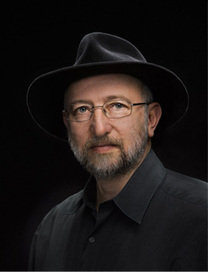
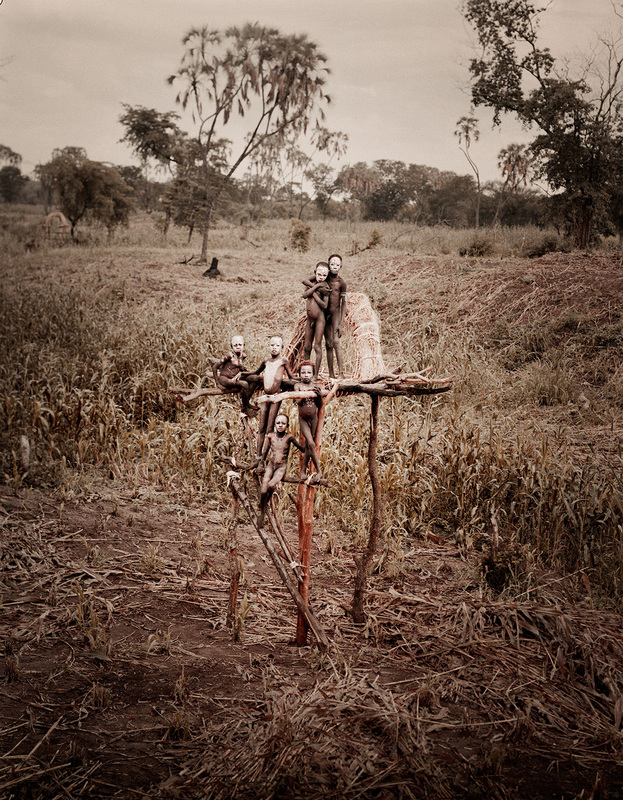
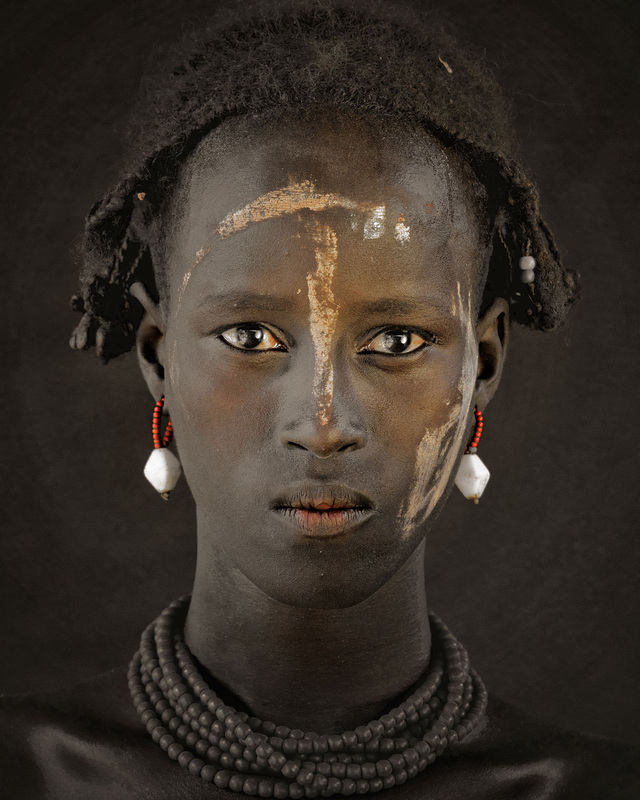
Steve Bloom - Tribal Africa
|
|
Steve Bloom is a writer and a photographic artist who specialized in evocative images of the living world. Born in South Africa in 1953, he first used the camera to document life in South Africa during the apartheid years. He moved to England in 1977 and co-founded one of London’s leading photographic special effects companies. |
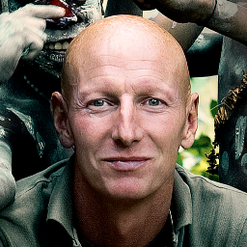
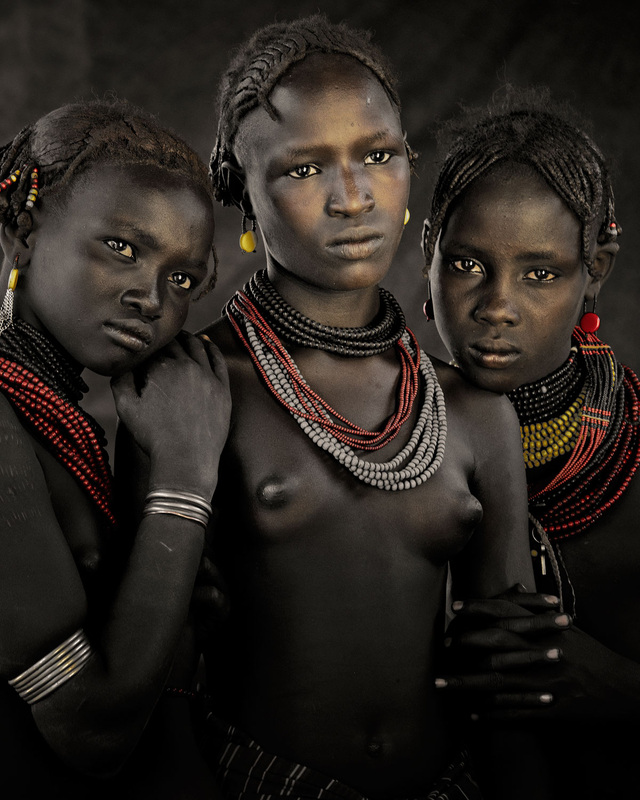
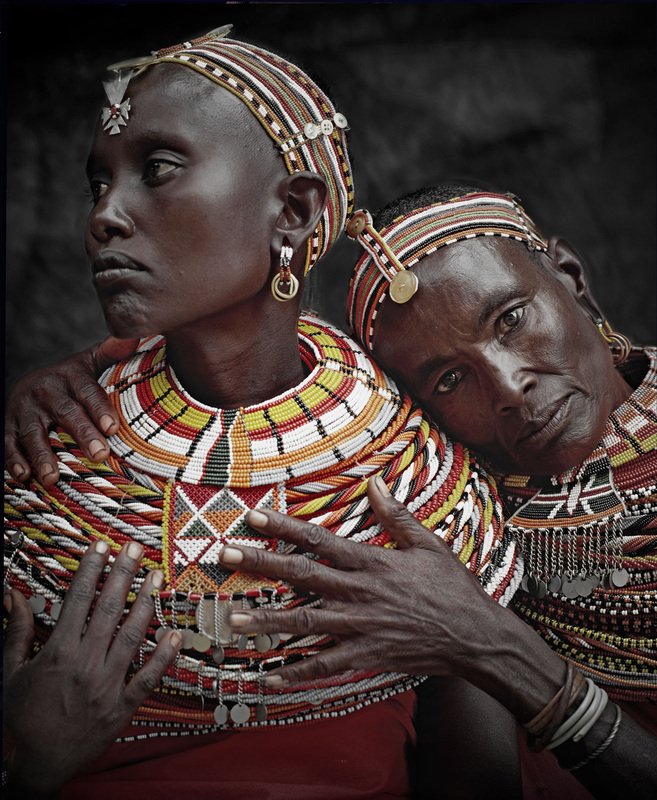
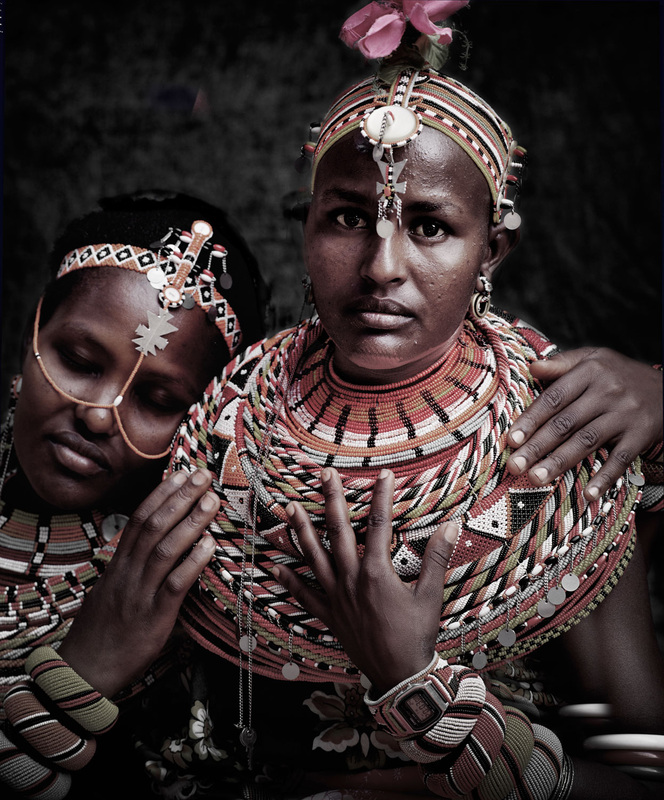
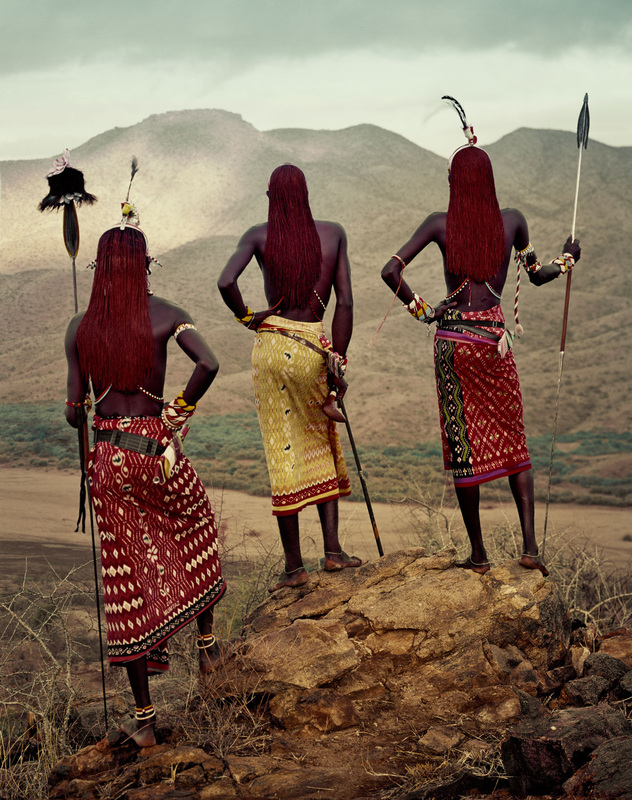
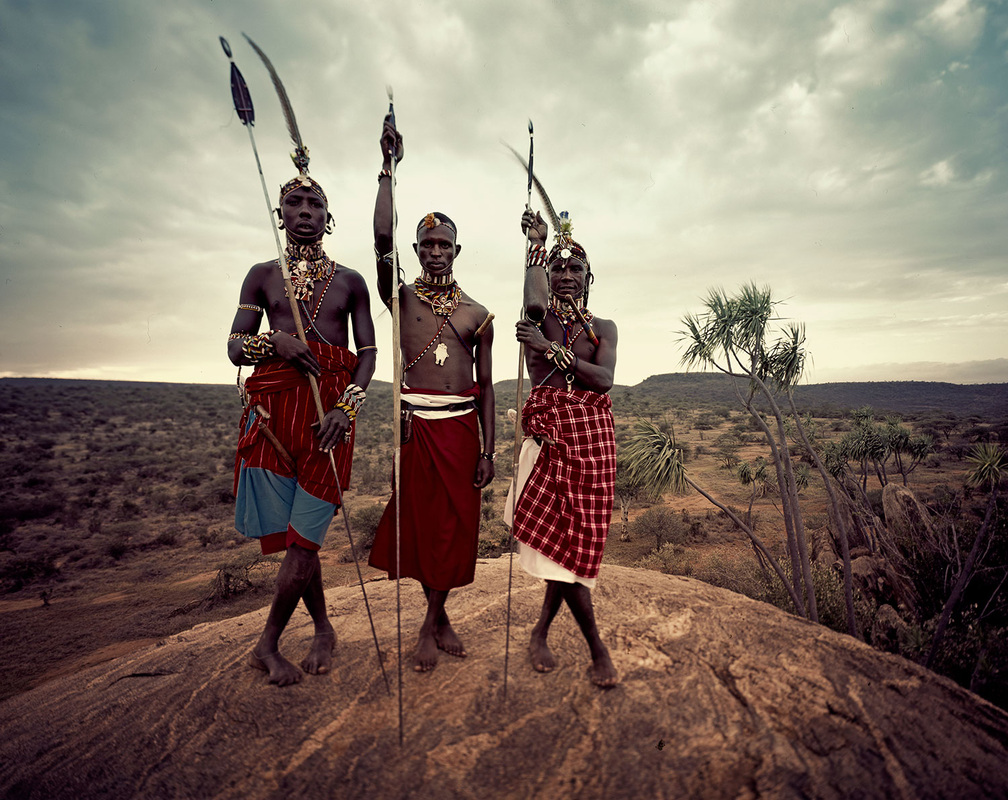
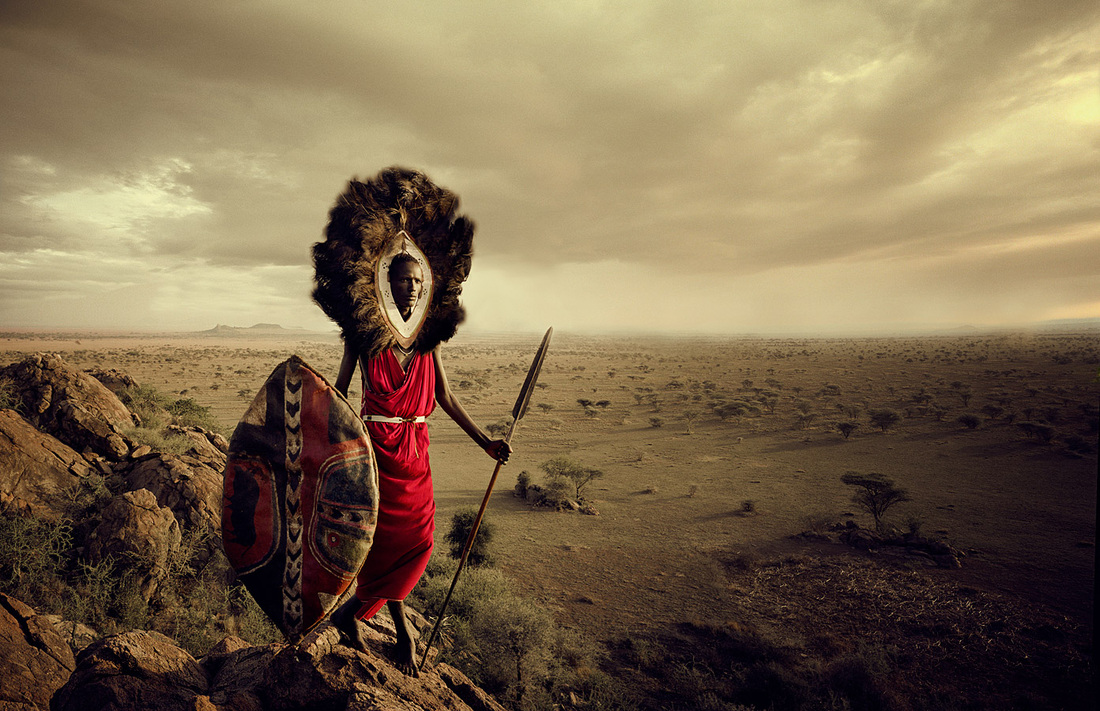
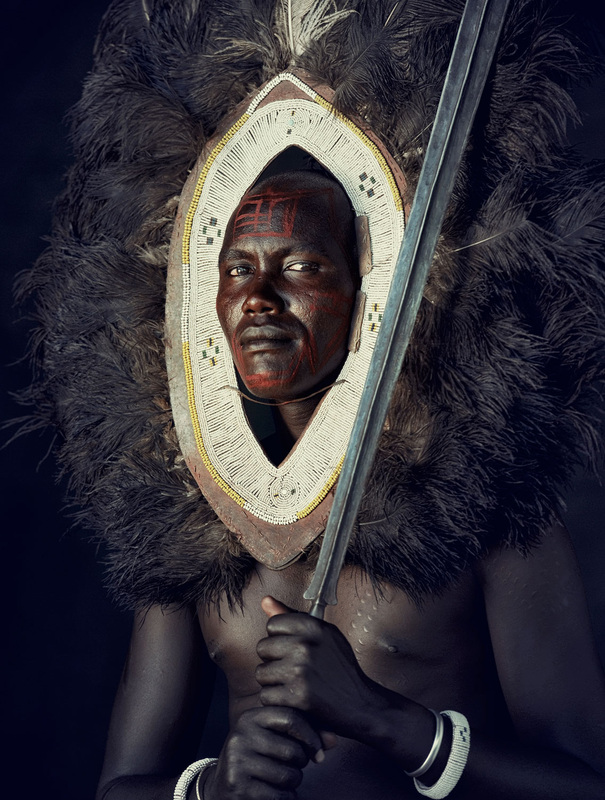
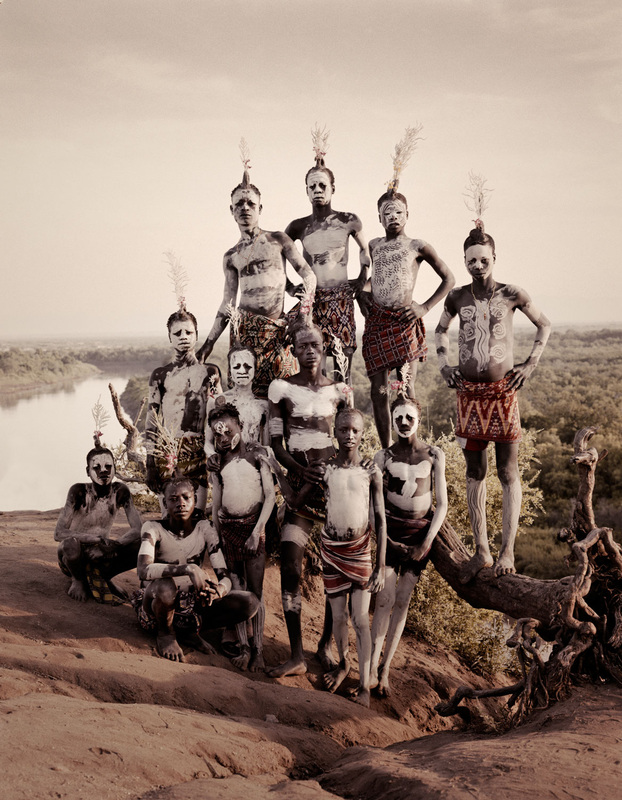
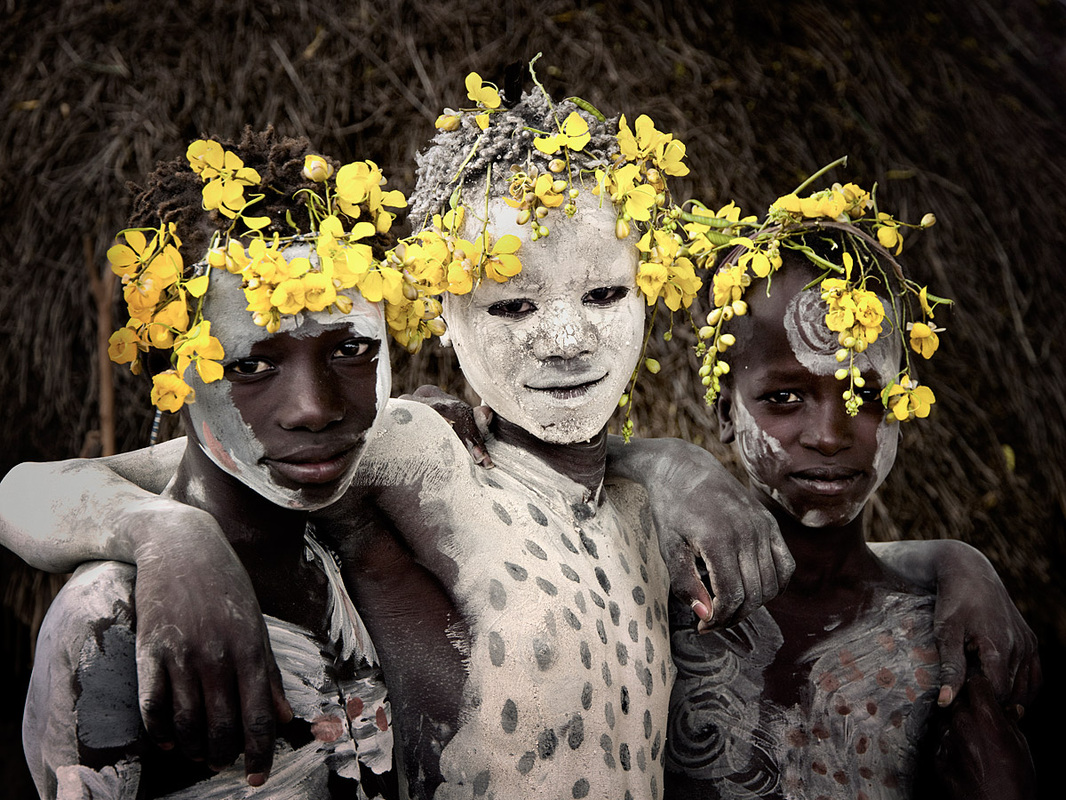
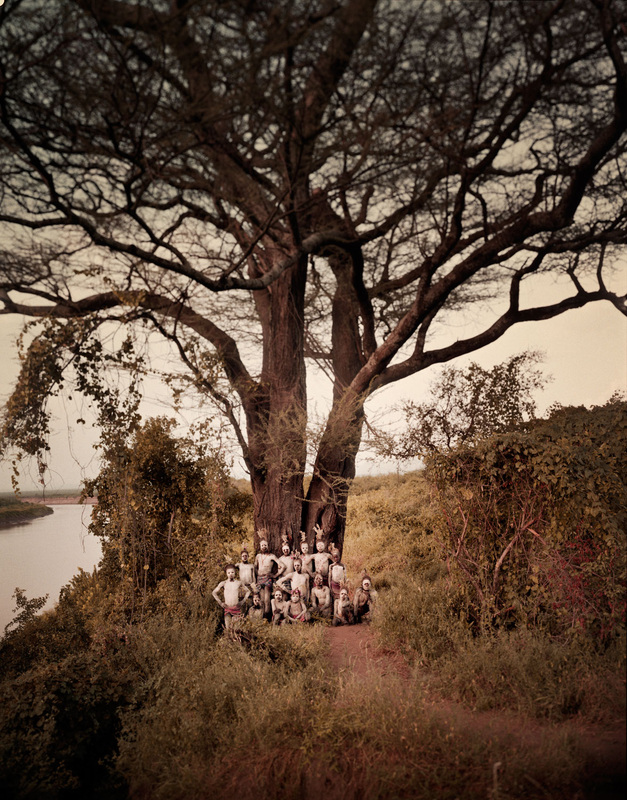
Jimmy Nelson - Before They Pass Away
|
|
Jimmy Nelson (Sevenoaks, Kent, 1967) started working as a photographer in 1987.From 1997 onwards Jimmy began to successfully undertake commercial advertising assignments for many of the world’s leading brands. At the same time he started accumulating images of remote and unique cultures photographed with a traditional 50-year-old plate camera. Jimmy Nelson found the last tribesmen and observed them. He smiled and drank their mysterious brews before taking out his camera. He shared what real people share: vibrations, invisible but palpable. He adjusted his antenna to the same frequency as theirs. As trust grew, a shared understanding of the mission developed: the world must never forget the way things were |
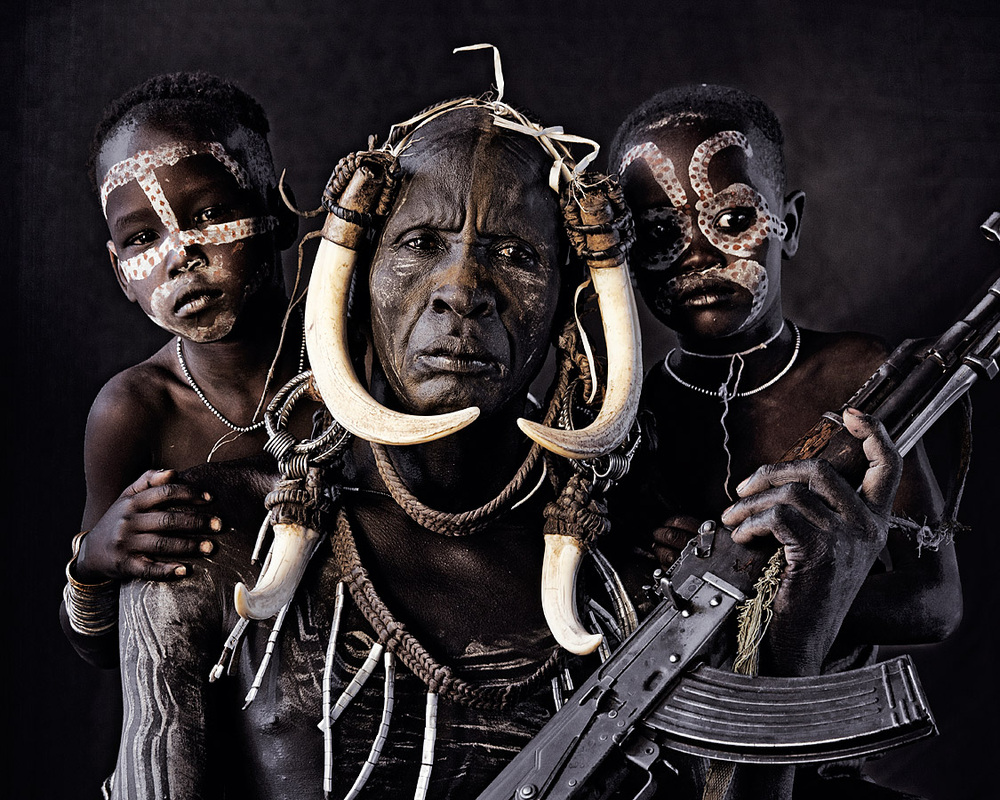
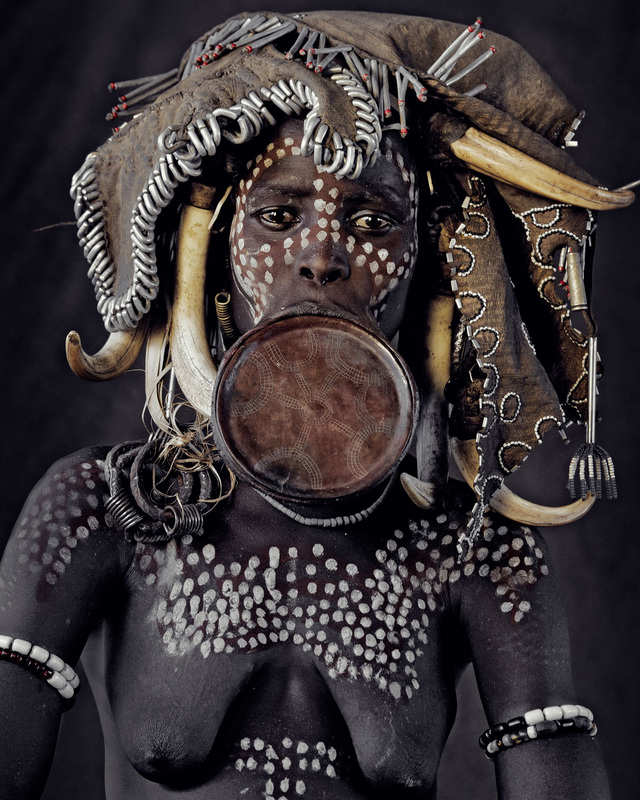
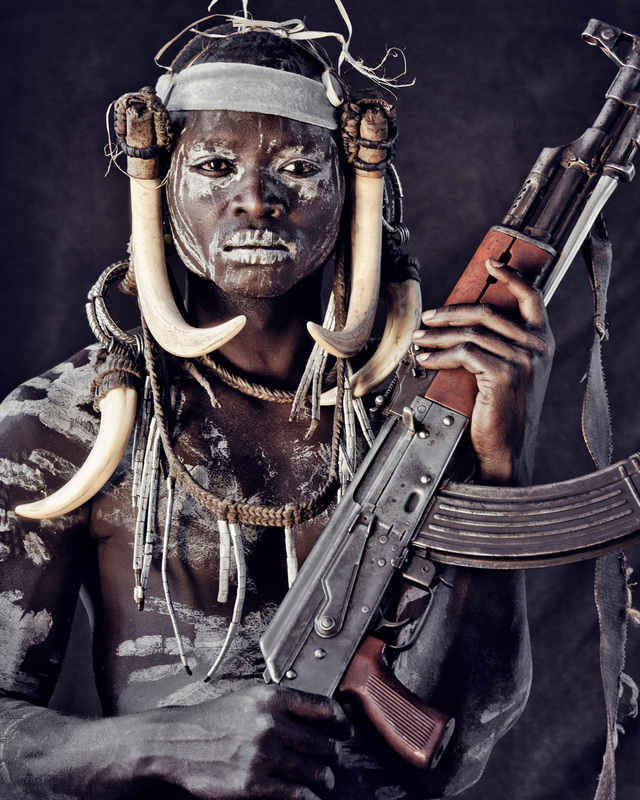
Mursi Ethiopia
|
The nomadic Mursi tribe lives in the lower area of Africa’s Great Rift Valley.The Mursi are famous for their stick-fighting ceremony and Mursi women are known all over the world for wearing clay plates in their lower lips. Their economy concentrated on bartering and sharing possessions. This changed when tourists arrived, offering money in exchange for photographs. |
|


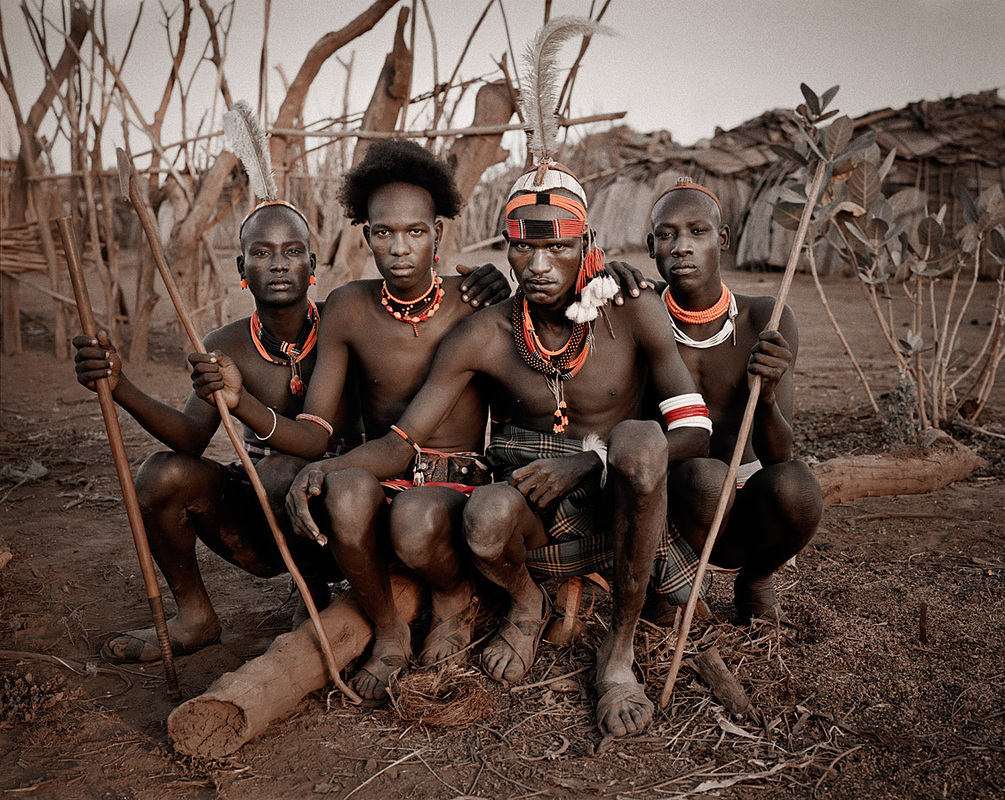
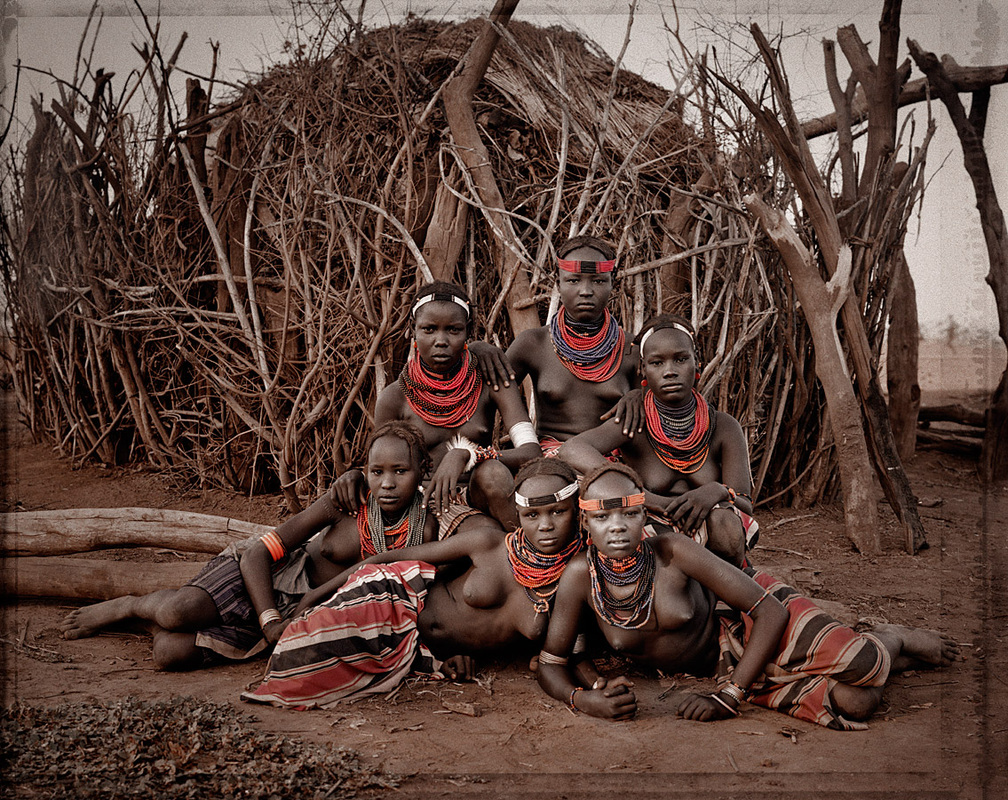
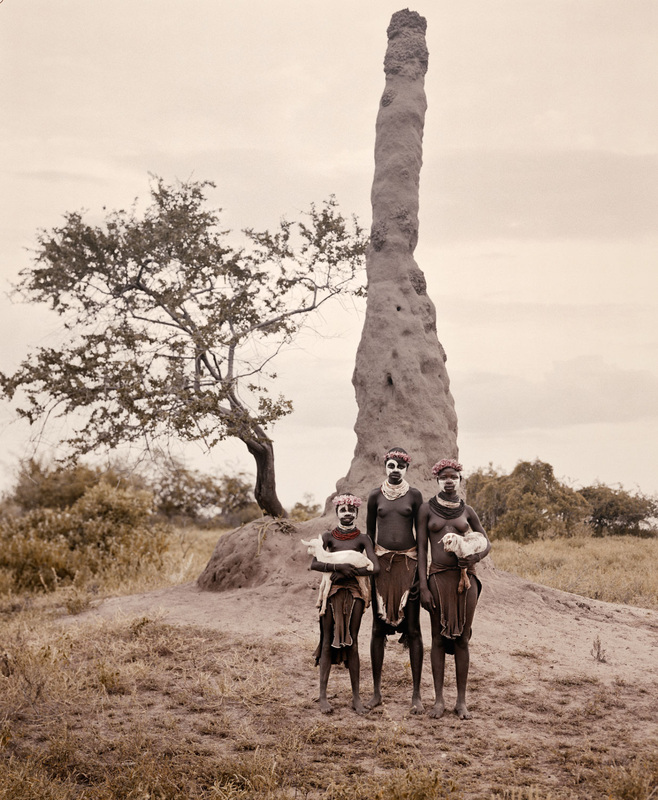
Dassanech Ethiopia
|
The Omo Valley, situated in Africa’s Great Rift Valley, is home to an estimated 200,000 tribal people who have lived there for millennia. The tribe is typical in that it is not strictly defined by ethnicity. Anyone will be admitted. “A close friend can become a close enemy” |
|


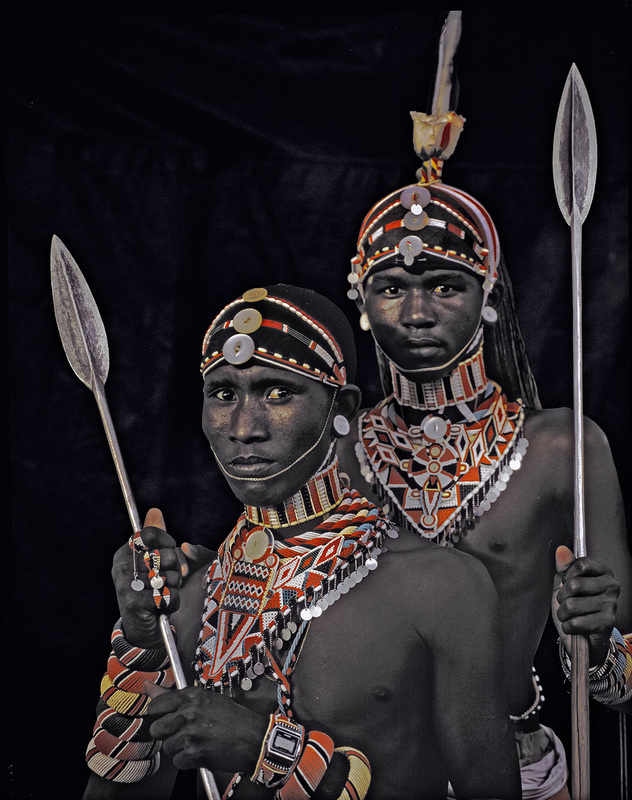
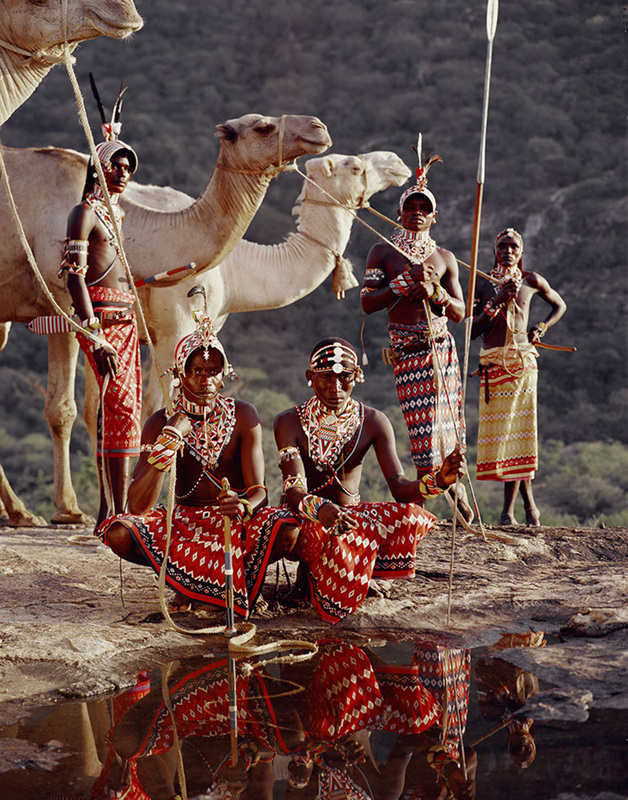
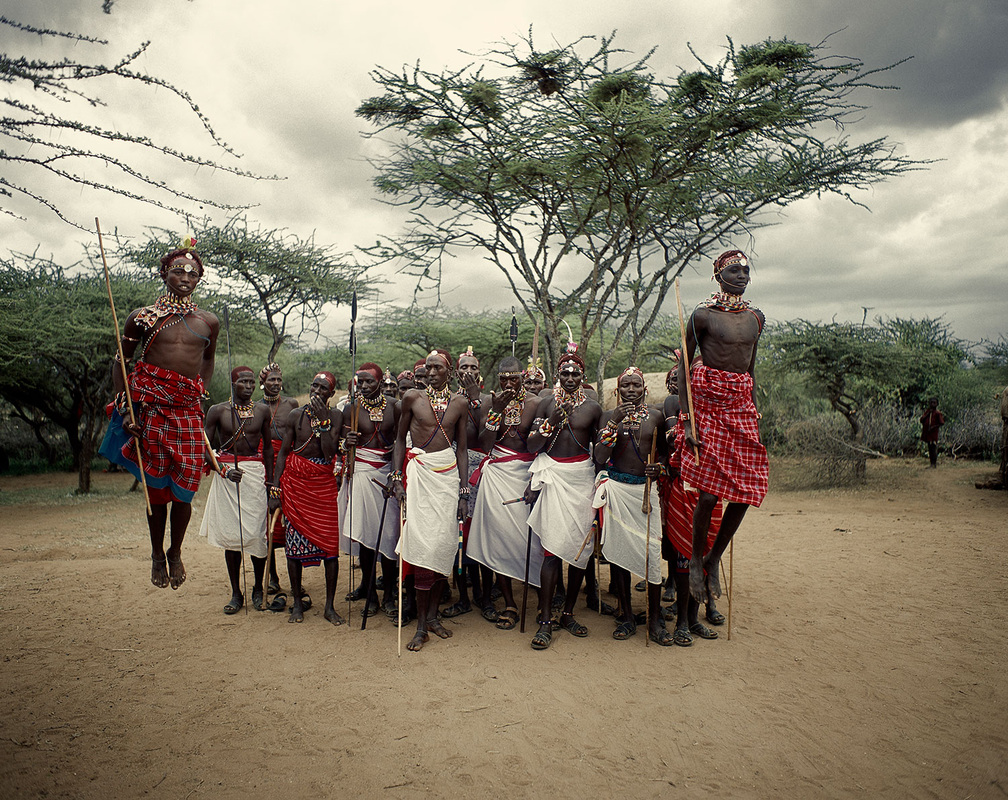
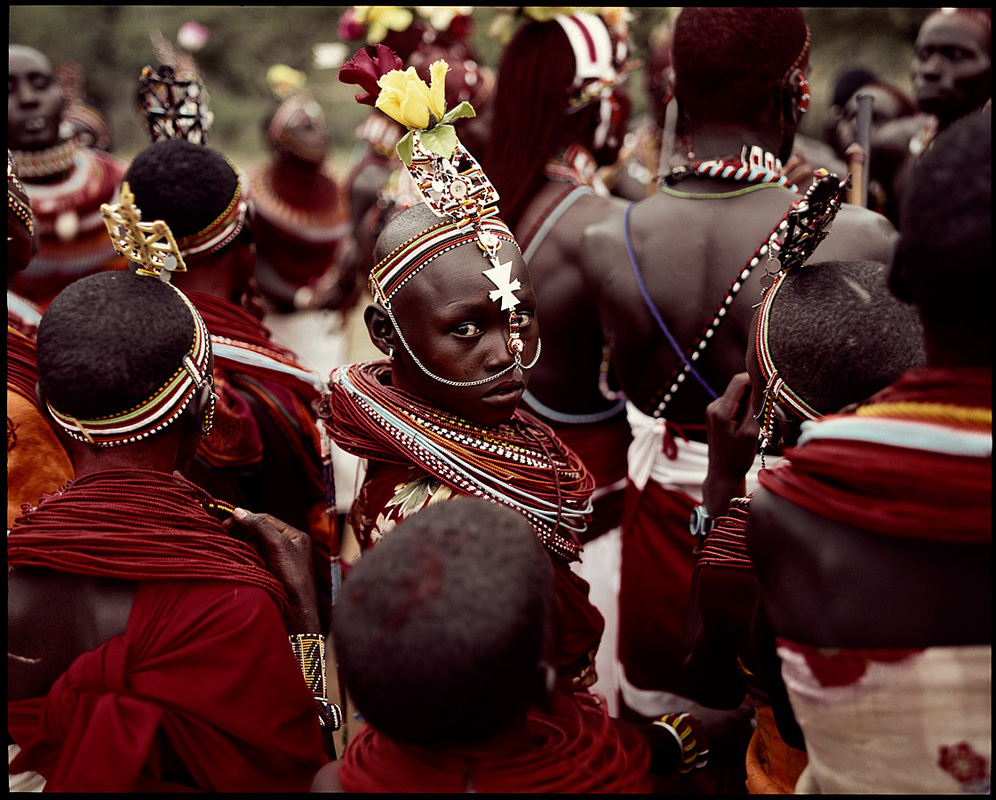
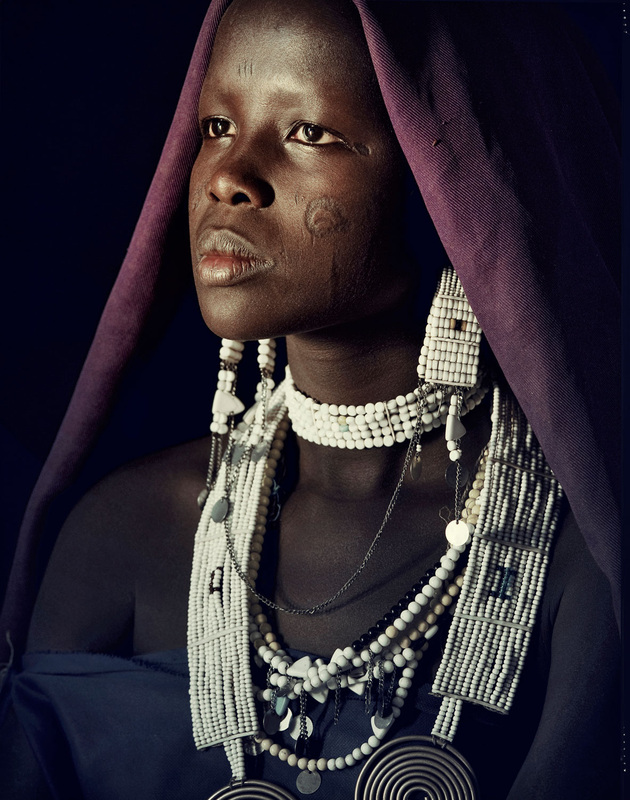
Samburu Kenya
|
The Samburu people live in northern Kenya, where the foothills of Mount Kenya merge into the northern desert. The Samburu have to relocate every 5 to 6 weeks to ensure their cattle can feed. They are independent and egalitarian people, much more traditional then the Masaai. “A deaf ear meets with death, a listening ear with blessings” |
|
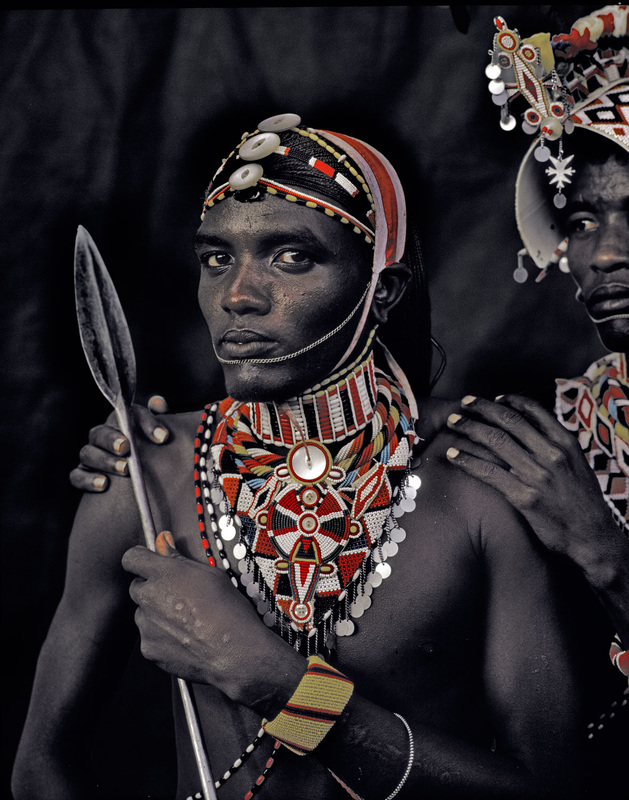
Maasai Tanzania
|
When the Maasai migrated from the Sudan in the 15th century, they attacked the tribes they met along the way and raided cattle. By the end of their journey, they had taken over almost all of the land in the Rift Valley. |
|

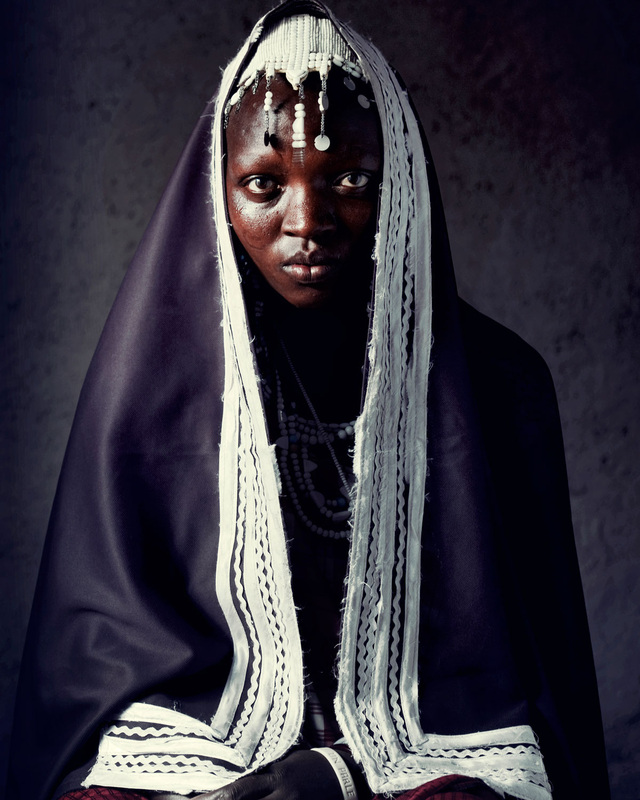


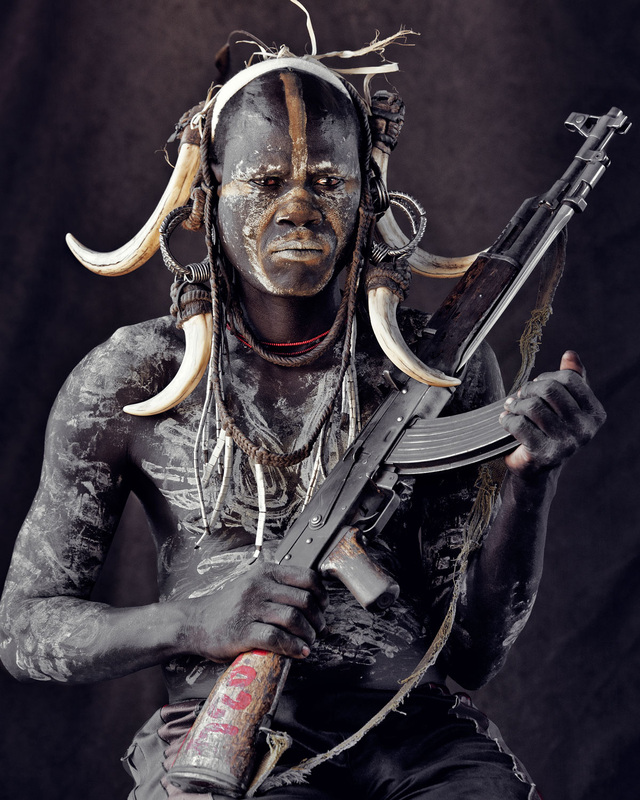
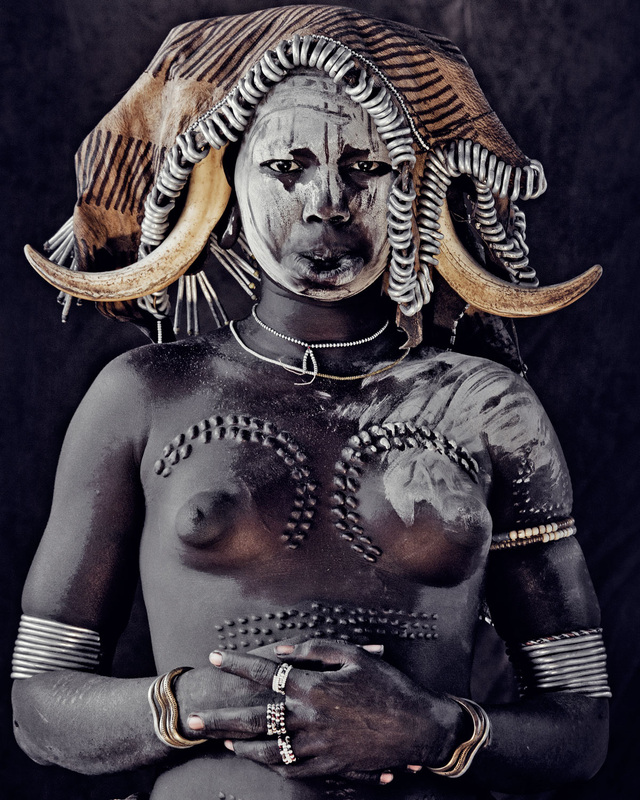
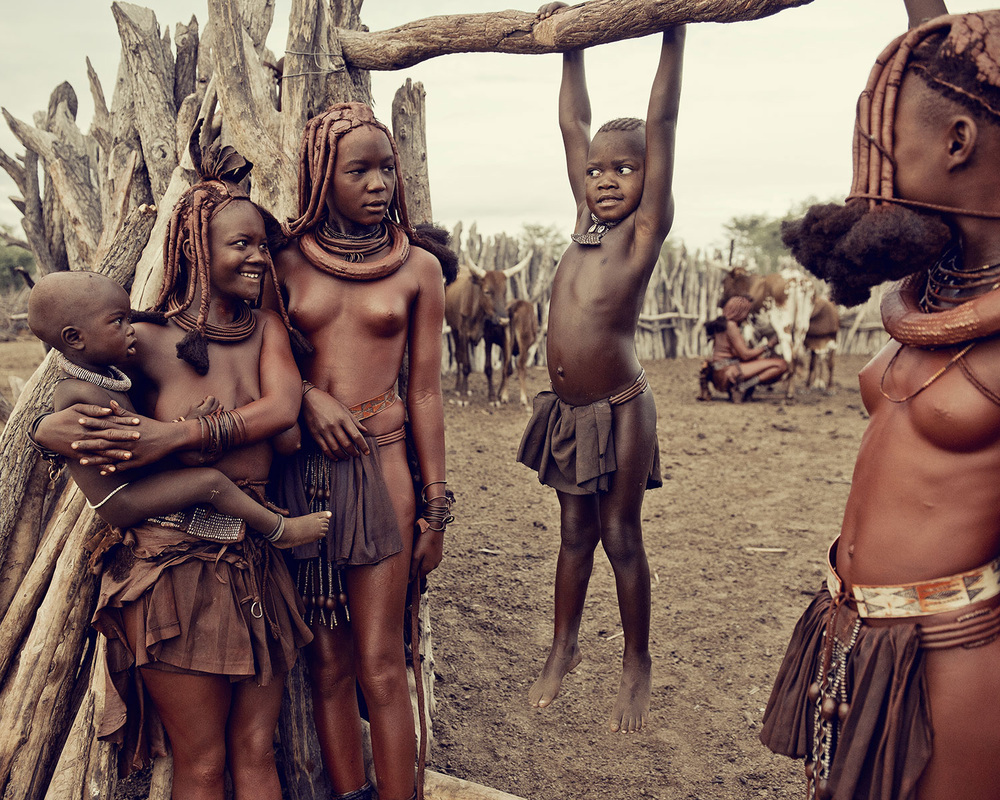
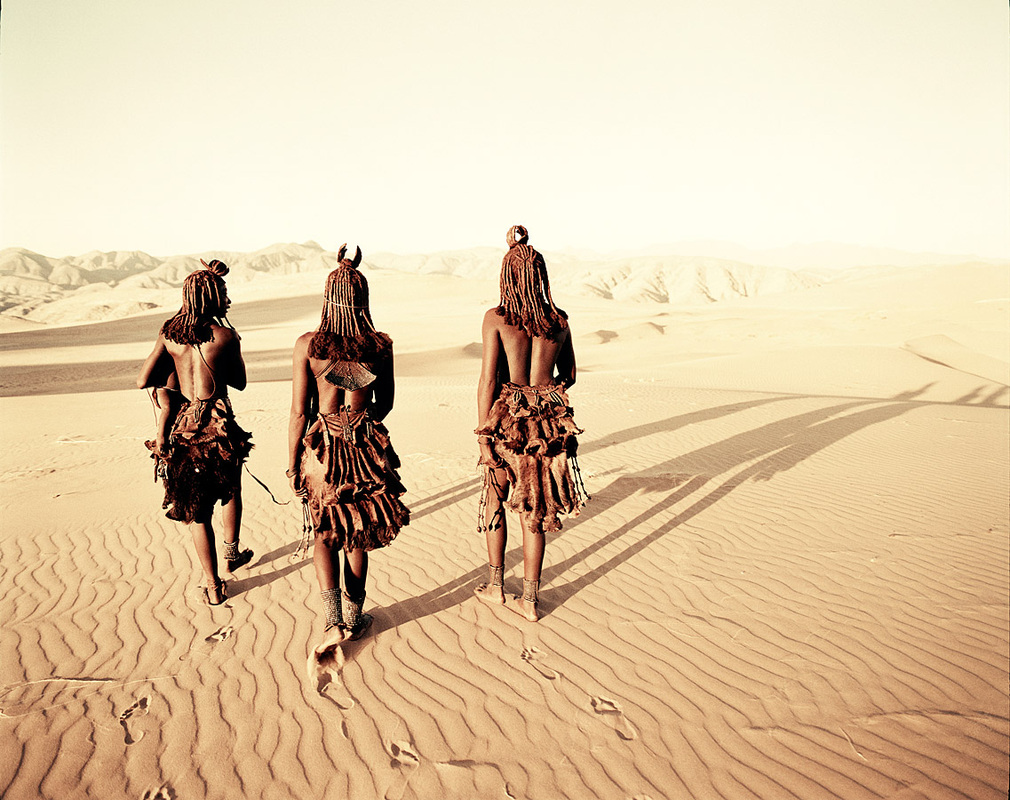
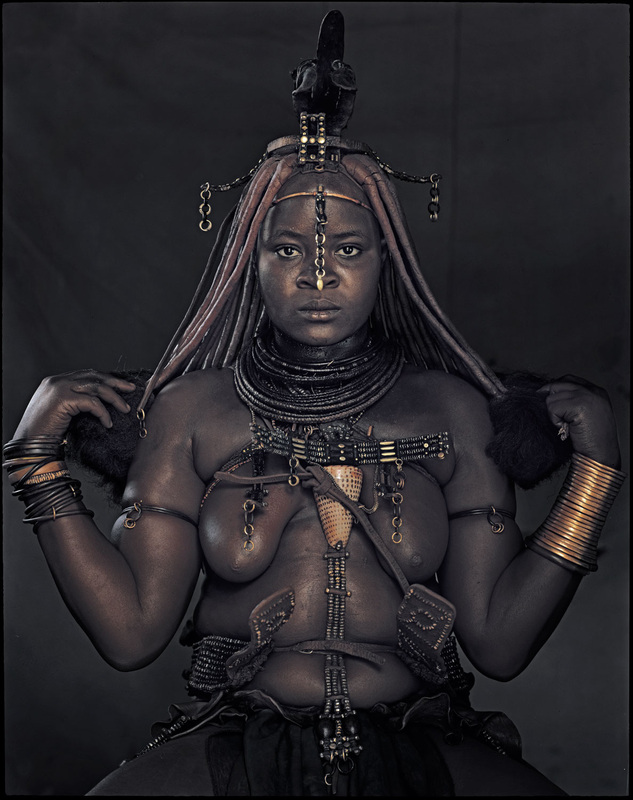
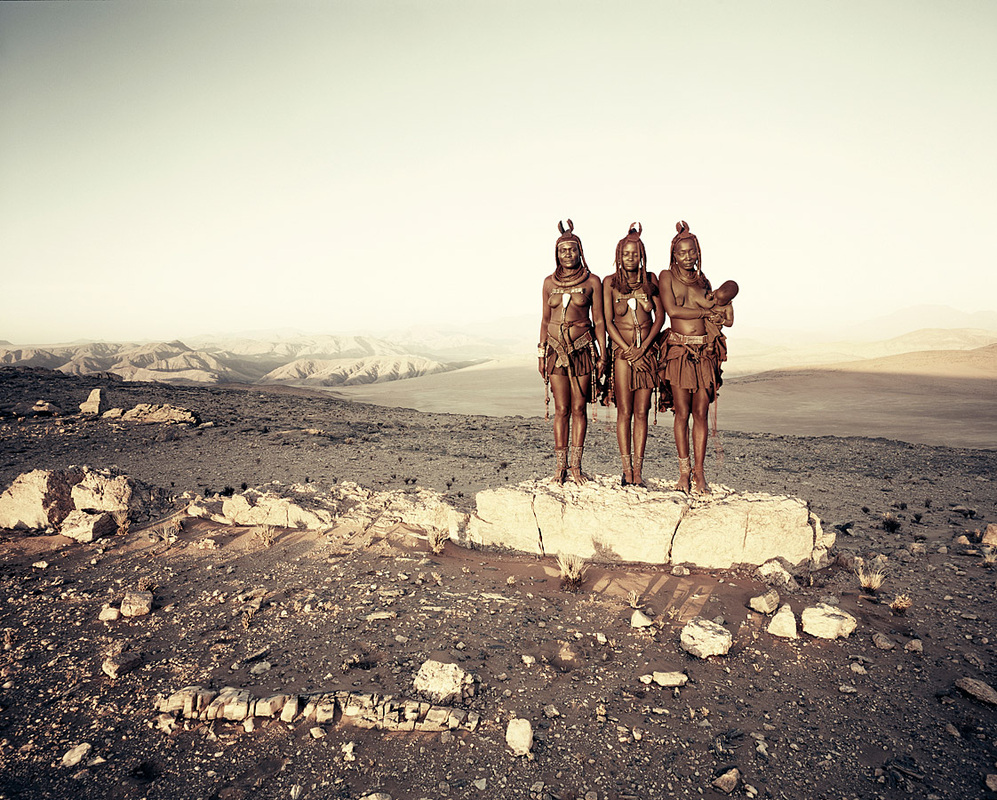
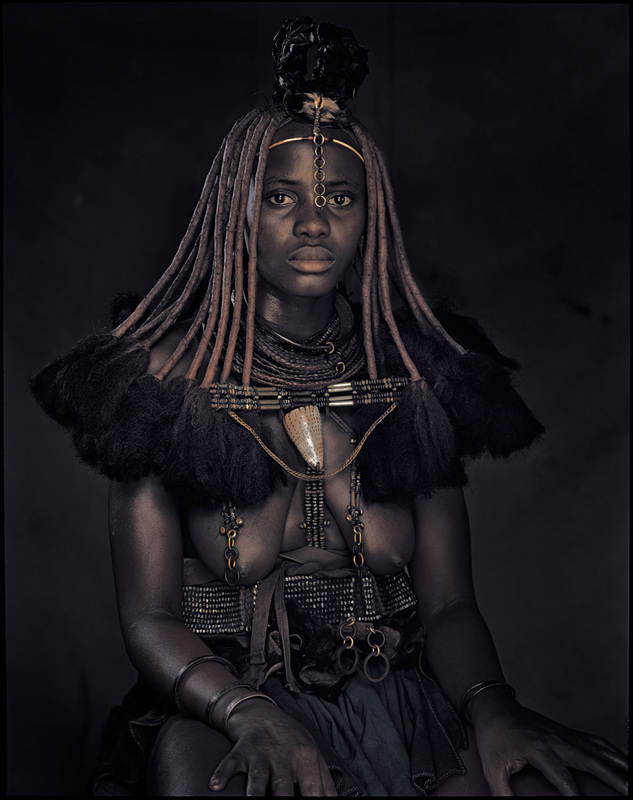
Himba Namibia
|
The Himba are an ancient tribe of tall, slender and statuesque herders. Since the 16th century they have lived in scattered settlements, leading a life that has remained unchanged, surviving war and droughts. Each member belongs to two clans, through the father and the mother. Marriages are arranged with a view to spreading wealth. Looks are vital, it tells everything about one’s place within the group and phase of life. |
|


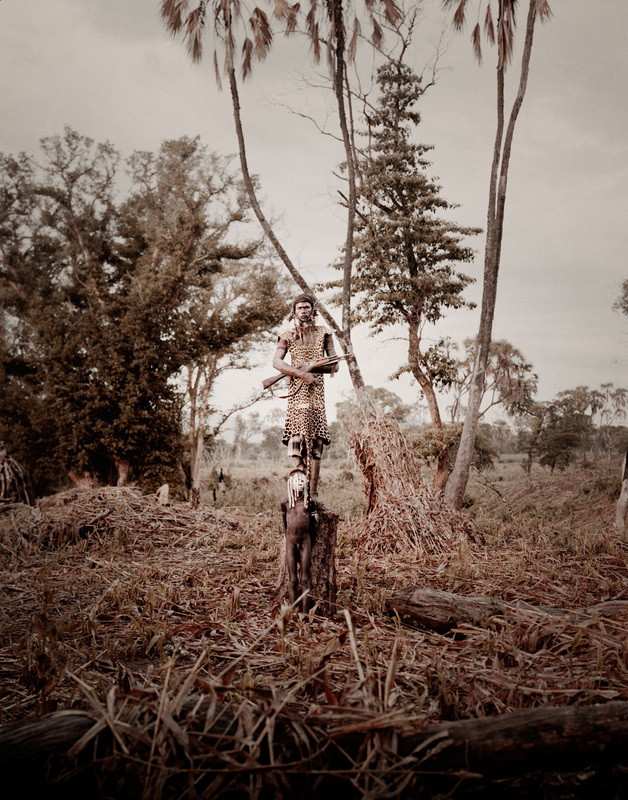
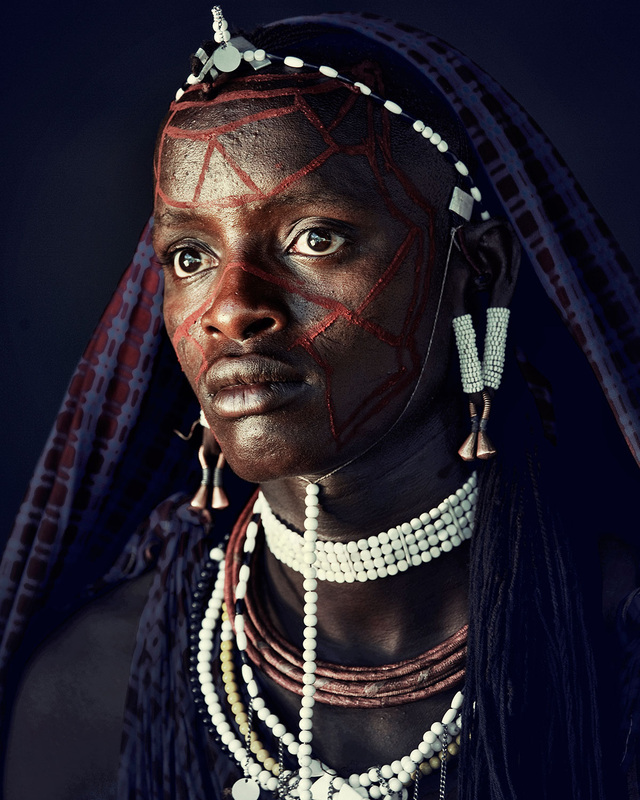
Karo Ethiopia
|
The Karo were known for their magnificent houses when still rich in cattle but after they lost their wealth, they adopted the much lighter conical huts. Every Karo family owns two houses: the Ono, the principal living room of the family, and the Gappa, the centre of several household activities. |
|


AO2- Creative Making
My Interpretation of Jimmy Nelson
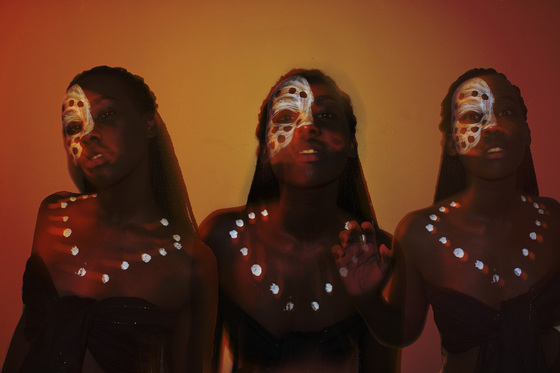
After researching about Steve Bloom and Jimmy Nelson I decided to try and interpret their work. With this photo-shoot I did at home with what resourced I had found. Looking at make-up the tribes used and how they presented it I did onto my models using just white paint. For the background I used my bedroom white wall, I thought that this would be best suitable because its plain and if I needed to darken it using photoshop it would be easier rather than black. Since this was home photo-shoot I didn't have any sort of lighting, this is the reason why the photographs didn't turn out to be at the standard that I had hoped it to be. Mid photo-shoot I decided to try and use a phone flash as a lighting source as you can see in images 17 to 33. I also decided to experiment with shutter speed and movement, the purpose of this was to give it a ghostly feel. The reason I did this was because for my initial idea I wanted to experiment with overlay as you can see with the image at the bottom. When I had finished editing I then realised that the photo-shoot wasn't strong enough when looking back at my past work. With this in mind I decided to pull away from the ghostly idea.
AO3- Reflective Recording
Modern Tribes
African
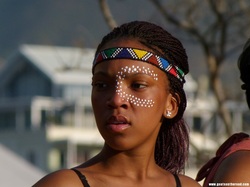
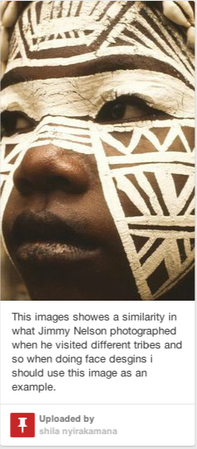
With modern day African clothing and style it has changed, introducing bright colours. When researching modern African tribes I came across this image with the picture of tribal face marking, this is traditional in most tribes in Africa using mainly white. Another feature of the image that appealed to me was the coloured hair band, in the 21 century people have interpreted modern Africa with 'Aztec' clothing and so this is something I could possibly use in in my photo-shoot.
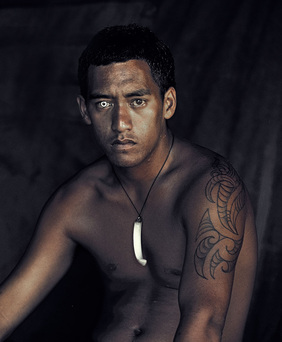
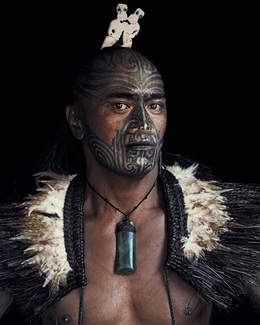
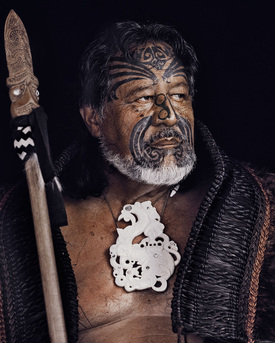
Maori
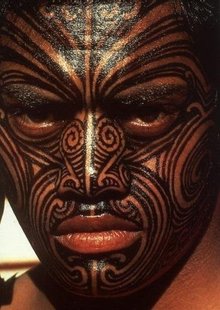
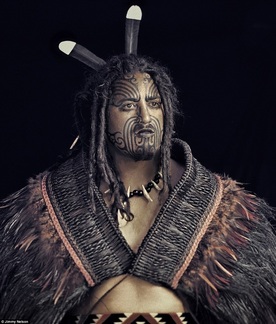
When researching about other tribes I came across the Maori tribe. The Maori tribe is in New Zealand and they have tribal tattoos marked on either their face or body, as you can see on the left this is the more traditional type of marking but as you can see below over the years people have begun to get Maori in other pleases and has become common tattoos gotten by men. This then inspired me to do something totally the opposite of the traditional Maori, rather than using a male model I could use a female. One of the photographers who have inspired me is Jimmy Nelson and when visiting tribes around the world he did a photo shoot with the Maori people as you can see below and so when working toward my final peace I will be working in his style but my interpretation.
|
|
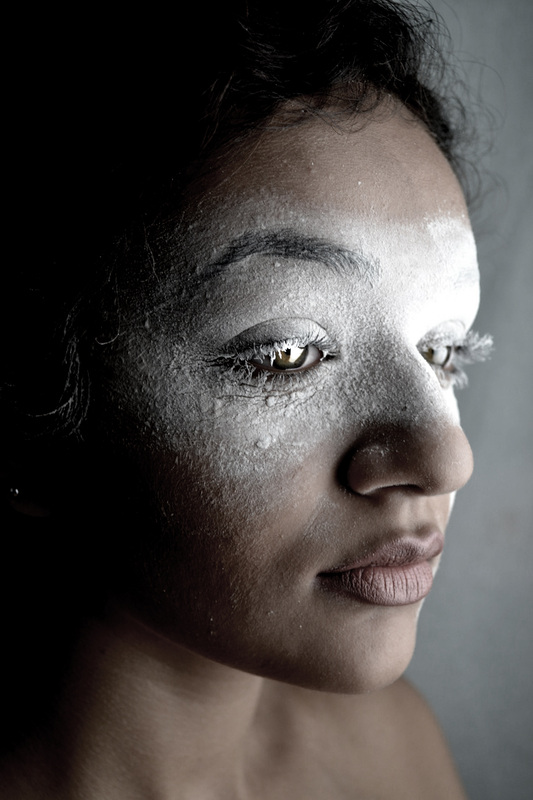
Photoshoot 1
|
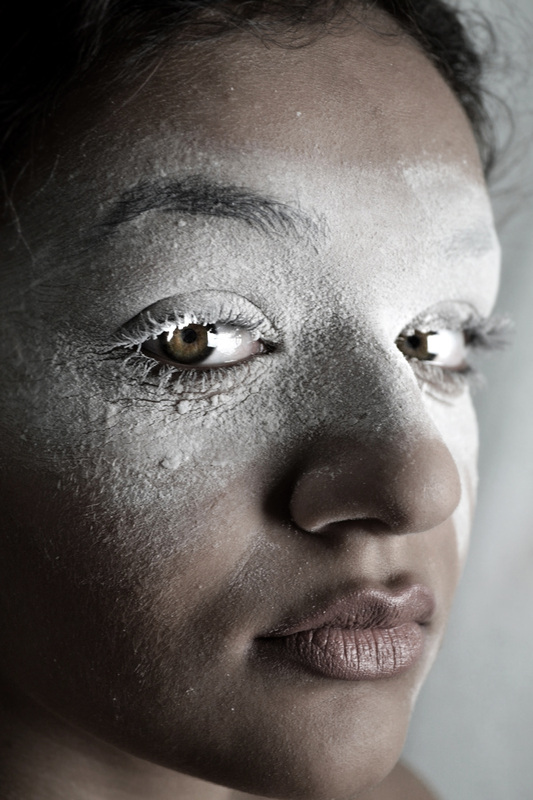
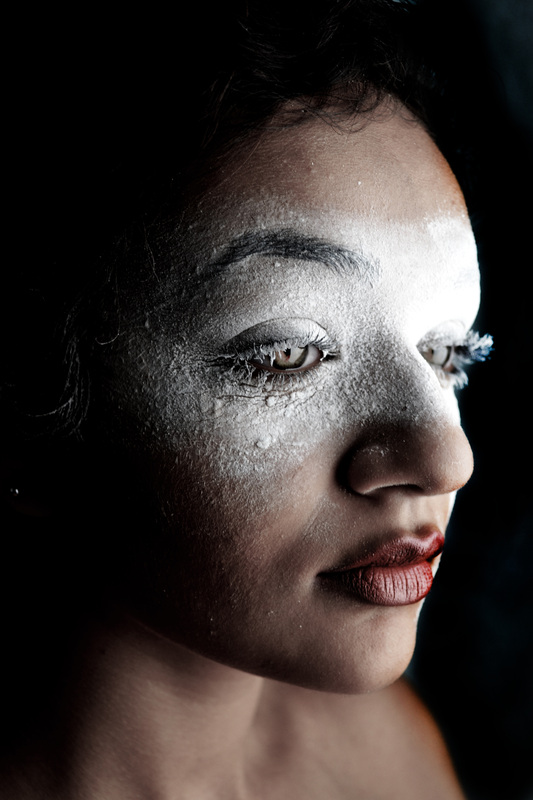
The first photo-shoot was of my model wearing nothing to cover her shoulders and with natural make-up meaning with just light foundation and a nude coloured lipstick, the reason for this is because it will make the while powder around her eyes stand out more. To apply the white mask I used baby powder and face lotion. At first I had tried to just smer the lotion on the area I wanted the powder to stick but then it came out to thin and didn't look like she had any on and so I decided to get a pallet and then mix the lotion and the powder together before applying it to the face using little lotion do it wouldn't come out runny. After applying it on with a thick brush I then got a little more powder and sprinkled it around the area so that it didn't look like white lotion and more of a powder.
At the beginning of the photo-shoot the images I took where of the chest-up showing the shoulders but when looking at the image I decided that when framing my photograph it should be an up-close shot meaning that I didn't have to think about costume and take the attention away from the face, as you can see in the images 1-8 the composition of the image isn't right, they is too much space that isn't needing below her shoulders and so this is something that will be taken into account this my other photo-shoots. |
What I found difficult while shooting was lighting, the reason being is that I had chosen a white background because when I tried black the make-up lost its value that being to make it fluffy and light. With the white background I thought it looked best because even if when it came to editing it didn't look right I would be able to darken it whereas with the black background it harder. When it came to lighting I had to right because of the composition of the photography which was Filling in the Frame, so meaning that it was a close up shot and so the difference of the lighting couldn't make the face over exposed and this is something that I had been doing at the beginning of the photo-shoot which I thought weren't at the standard I wanted. What I have noticed throughout the photo-shoot of the portrait and exam piece is that the models face is light and so very easily over exposed and so this is why I had difficulties with lighting. I used mainly very light clamshell lighting by moving the lights further apart.
What I likes about this photo-shoot was how close up the framing is the reason being you could see the texture of the powder giving it a better effect of how focused it is. |
Editing
Experimenting with background
|
|
When thinking about the final piece, I had to decide what type of background I would have. As you can see on the right I had the choice to have a dark or light background. I decided to go with the grey background mainly because when editing the darker background I noticed that the other side of the models face was over exposed. The type of lighting I had used initially with the white background suited it best. |
Inspiration

|

|
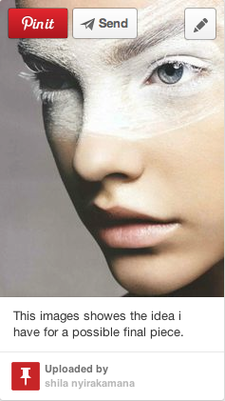
This photo-shoot was inspired by the image on the far right. I found this image while researching tribal make-up. I was appealed by this image because of the simplicity of the make-up and how it made the eye colour of the model stood out. Taking this into account I started to think about how I could do my own interpretation of the image and picked this specific model because of her eyes. |

|

|
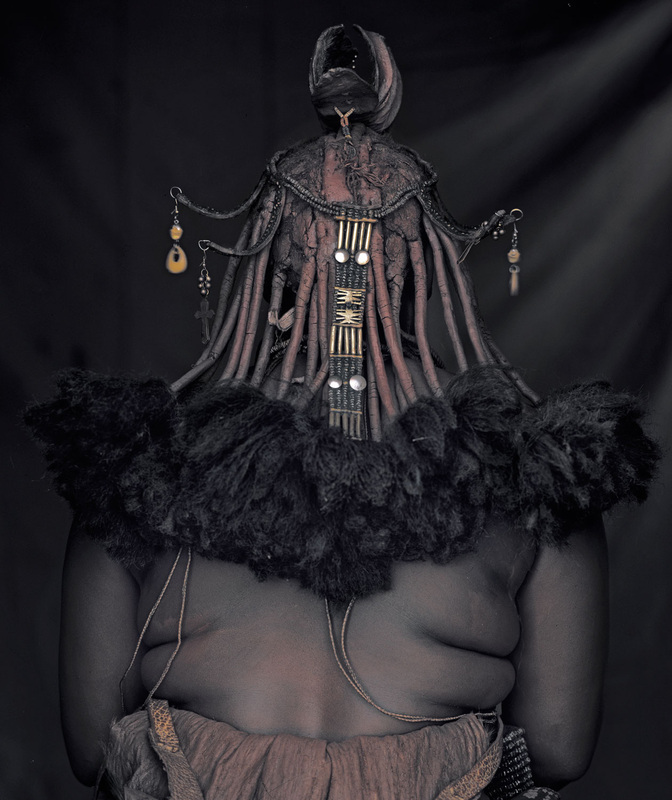
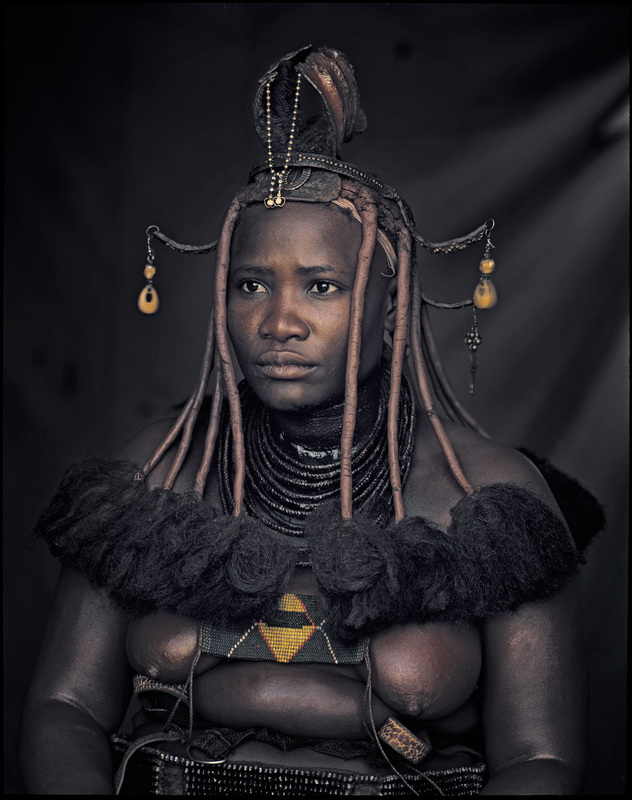
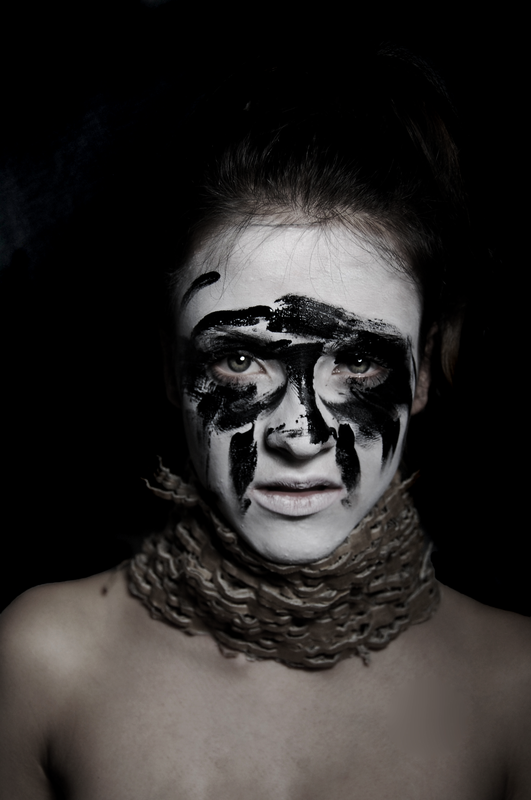
Photoshoot 2
|
The second photo-shoot was of my model with white base acrylic paint and black smudges made by brushes and hand, my model then had neck piece made of cardboard and bare shoulders/cardboard around the face and white then black background. In this photo-shoot I have four different looks. Firstly I had tried to have the model in just a neck piece and with just hand smudges made by myself and a white background, which I preferred, these are images from 1-9. Secondly I tried the same look to a black background; the advantages of this is that it emphasised the make-up of the model it being white, the advantages I would say would be that it stood out too much where I wanted it to have a similar effect as my first photo-shoot, these are images from 10-18. Thirdly I tried the white background again but then smudge the model's face even more using my hands so the it looked messy as the ones I did with my hand looked to neat so wouldn't have the effect of it being tribal, these are images from 20-24. Fourthly I tried having the cardboard around the model's face, this I found when editing would look too much, it had to either be the make-up of the cardboard mask.
|
What I found difficult with this photo-shoot what that before applying the make-up I had to make sure I got it right otherwise it would have come out to look too much. Another thing I found difficult was the lighting again with past experience with using this model is she is also very light and so have to be careful and also because the base colour being white makes it even more difficult because I find it harder to get the right lighting or a white colour.
What I liked about this photo-shoot is that I got to experiment with make-up this time and so watch video's of make-up tutorial's to get an idea of what I want to do and how to apply on the make-up so that I could experiment and so a design I wanted. Youtube Tutorial |
Background
|

|
When it came to editing I needed to decide whether I wanted the background black or the grey colour it is taking in mind of the photo-shoot before and how I edited them when experimenting. I decided to go with the grey colour, I thought it suited best because with the black background the models hair is lost and so I believe it is presented best with the full look of the messy tied up hair. Also with the lighter background I am able to experiment and add things to the background. |
Experiment with background
|
|
To experiment with the background I decided to ad cracks in the wall. I first downloaded a brush as you can see in image 1 on the left from a website recommended by my teacher before hand. After downloading it I double clicked where its highlighted in image 2 to add the brush into photoshop. This then gave me various crack brushed I could use as you can see in image 3. When editing I changed the diameter of the brush so that no all the crack were the same size this helped it to look more realistic. |
Before & After

|

|
For the finishing product I lightened the the photograph so that the might make-up was white and not grey. The cracks on the wall i believe have brought a positive effect to the image because its not dull. My theme being trible can relate to this image because of the grittyness of the image. |
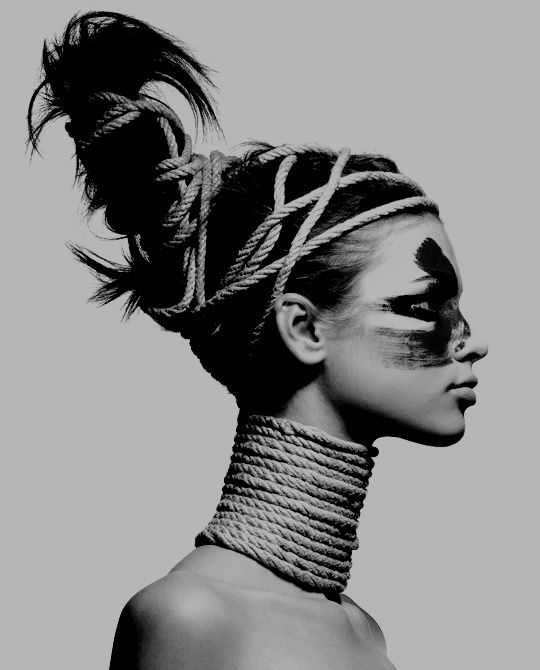
Inspiration
|

|
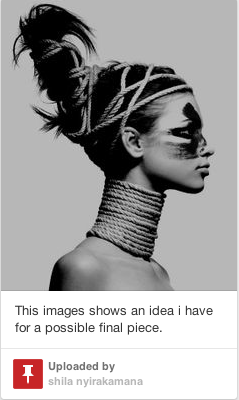
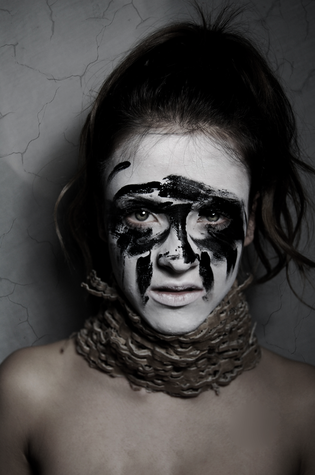
This photo-shoot was inspired by the image on the right. The model in the image has rope tied around her neck and hair and when I saw this image it inspired me to so something similar using something other than rope and so I went around school looking for props when I came across cardboard that had been cut up, it has an African clothing look to it and so decided to used it as a neck piece to resemble the rope in the image on the right. |
|
|
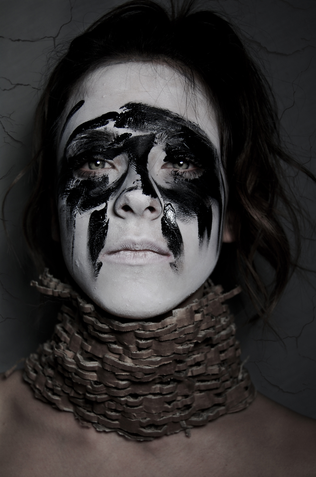
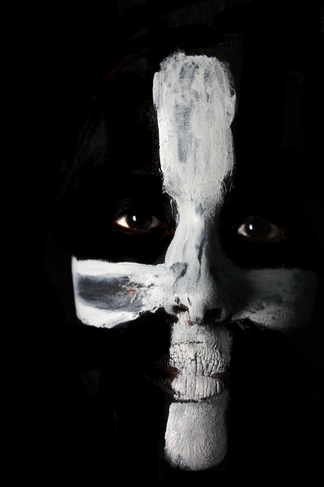
Photoshoot 3
|
The third photo-shoot was of a model that I hadn't used before. The model is covered in black acrylic paint and white cross, she also had her hand black too. This makes it seem as if her whole body is black. I used acrylic paint because it is easy to remove but more importantly, when applying it on it leaves texture for example the models hand had wrinkles and so wit the paint you can still see them.
At first i hadn't put the paint all the way down her neck as you can see in images 1-5, I quickly solved this by applying more paint. When going back I took more shots and then realised you could still see her skin, as I was taller than the model I had to position myself carefully. I had decided that the composition of the photography would be similar to the first photo-shoot. Even through I couldn't position myself right throughout the photo-shoot I knew than when it came to editing I could burn her skin or crop unnecessary spaces within the frame. |
One difficulty I had during this photo-shoot was that the pain would dry and so would show cracks revealing the models natural skin colour, this meant that I would continuously have to apply more paint and waste the time I had in the green room. Something else I found difficult was the lighting. Throughout the photo-shoot I used a vary of lighting techniques to see which one best suited this mean that I wasn't able to work as efficiently as the past photo-shoot trying to get the right type of lighting.
For this photo-shoot I chose a white background the reason being that if I had used a black background the set would have been too dark, the models make-up and hair is black so meaning she would have blended in too much. With the white background I can make darker so that the model is still blending in but not too much. Also what I noticed during the photo-shoot was the the white background helped to emphasis the white cross on her face. |
Editing
|
|
When it came to editing it was fairly simple, I first duplicated the layer as you can see in image 1 as I do all the time with every image so that if I make a mistake I can fix quickly. Secondly I added another layer, I wanted to darken the image so that it would be easier burning it, I then covered the whole image in black then changing the opacity of the brush and filling so it were so harsh as you can see in image 2. Throughout the editing I used mainly the burn tool as you can see in image 3 to blend the model's face and background, I then used the dodge tool as you can seeing image 4 when it came to whitening the eyes. |
|
|
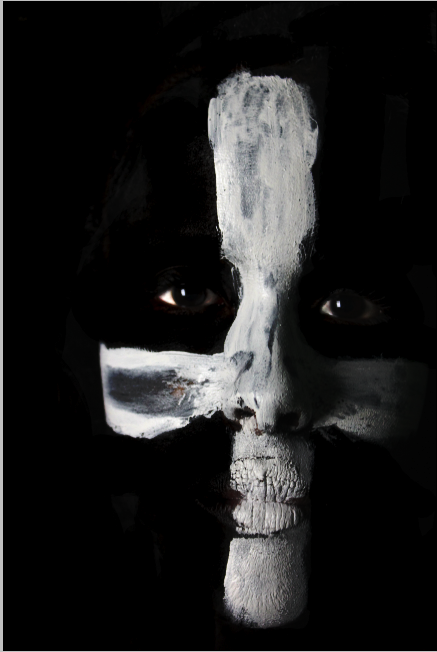
As you can see in the images on the right I blended the face to the background leaving her with the obvious features of her eye mouth and nose so that people know its a person. |
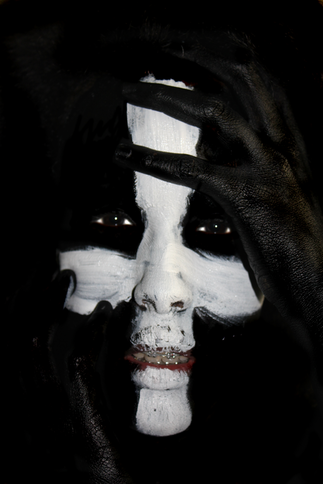
Inspiration
|

|
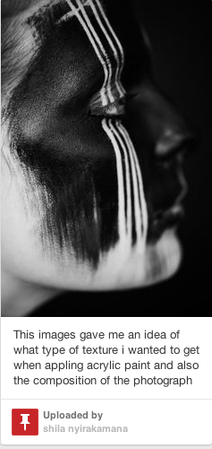
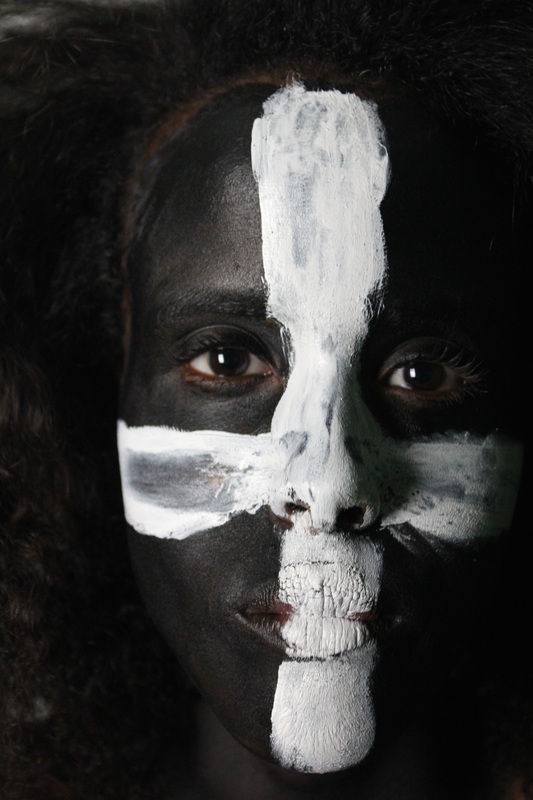
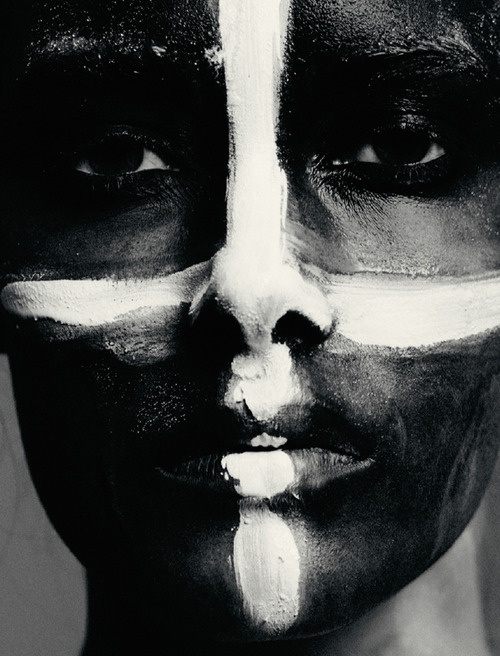
The image on the right inspired me with this photo-shoot. I added my own touch to the make-up making the line thicker because being the model's face shape is different to the my model and so thicker lines suited best. Also the colour of the image are different mine being black and white the reason being I wanted it to have a scary effect by blending the background and the model. |

|
|
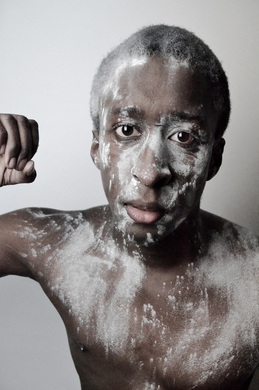
Photoshoot 4
|
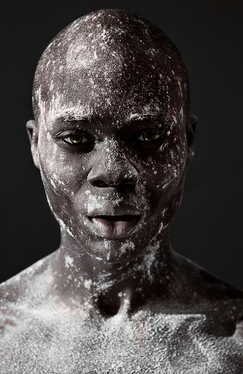
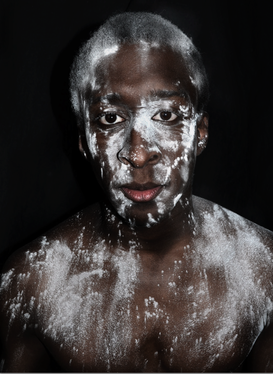
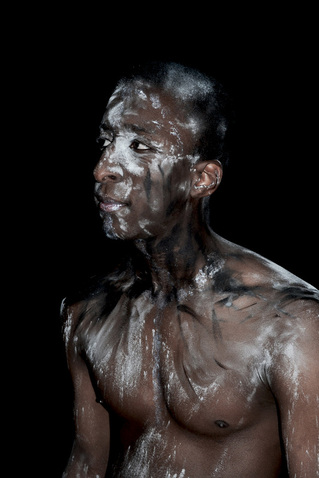
My fourth photo-shoot was also of a model that i hadn't worked with before. The model at the beginning of the photo-shoot is wearing a white t-shirt with a gold chain. His make-up consists just white powder, this look was done just using baby power, because of the model's skin colour the white powder was emphasised even more.
At the beginning of the photo-shoot i had decided that the model would wear a white t-shirt with his make-up just on his face. When looking at the images i had already taken i tried to think of a way to improving the shot and this was to have the model topless and applying more power to his chest. Since this photo-shoot was inspired by a image i came across while researching help me with knowing how to light the set. It was difficult at first but gradually when experimenting i decided to use clamshell lighting like the rest of my photo-shoots the reason because because i want all the face to be seen clearing with not shadow of the face. |
Throughout the photo-shoot i changed the background several times also changing the make-up, this was because i wanted a varieties of options when it came to editing with what look i would use for my final piece.
Since my theme is tribal, to illustrate this i used white powder rather than any other colour because traditionally white is the colour most african tribes use to mark their faces and bodies. |
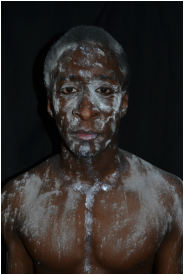
Experimenting with background
|

|
Throughout this photo-shoot i changed the background between black and white with the different looks i tried. I found that i preferred the black background the best the reason being because with the white background, the make-up of the model seems to fade with the background. |
Experimenting with make-up

|
|
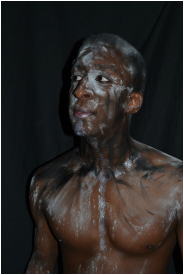
|
Before the photo-shoot i had planed to experiment with the make-up as I went along. Just like photo-shoot 2 I added more paint and make-up to the model. In the first image you can see what i stared initially stared of with, he just had white baby powder on his face and body. In the middle image I added a bit of silver acrylic paint to his face and chest, i also applied more baby powder. In The image on the right you can see i applied black acrylic paint using my fingers to smudge on his chest and face mixing it with the white baby powder.
|
Editing
|
|
When it came to editing this photo-shoot it was fairly simple. To adjust the images by changing the brightness and contrast, levels and vibrance. When it came to editing the background i used mainly the burn button, this darkens a background you have so for me it darkened the black still making it loot natural. |
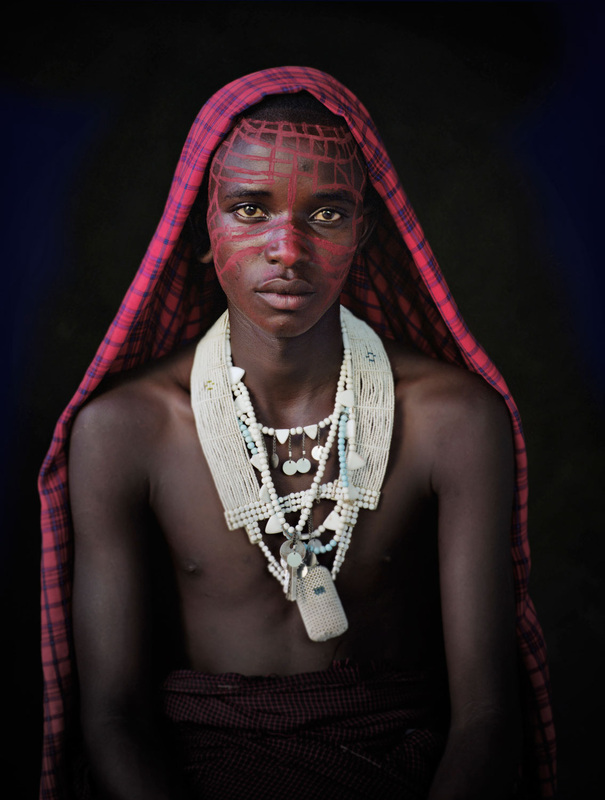
Inspiration
|
|
The image on the right inspired me for my final photoshoot because i thought it suited best with the theme i had. With my photo-shoot i applied the make-up differently to how the image on the right was. When it comes to comopsition, in my photo-shoot i used similar style to the image on the right and the rest of my photoshoot's
|

|
|
AO4 - Personal Presentation